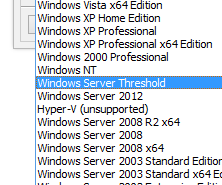
VMware Workstation 11’s wizard for creating a new VM includes an option for “Windows Server Threshold”…

Technology, law, life, and more.
VMware Workstation 11’s wizard for creating a new VM includes an option for “Windows Server Threshold”…
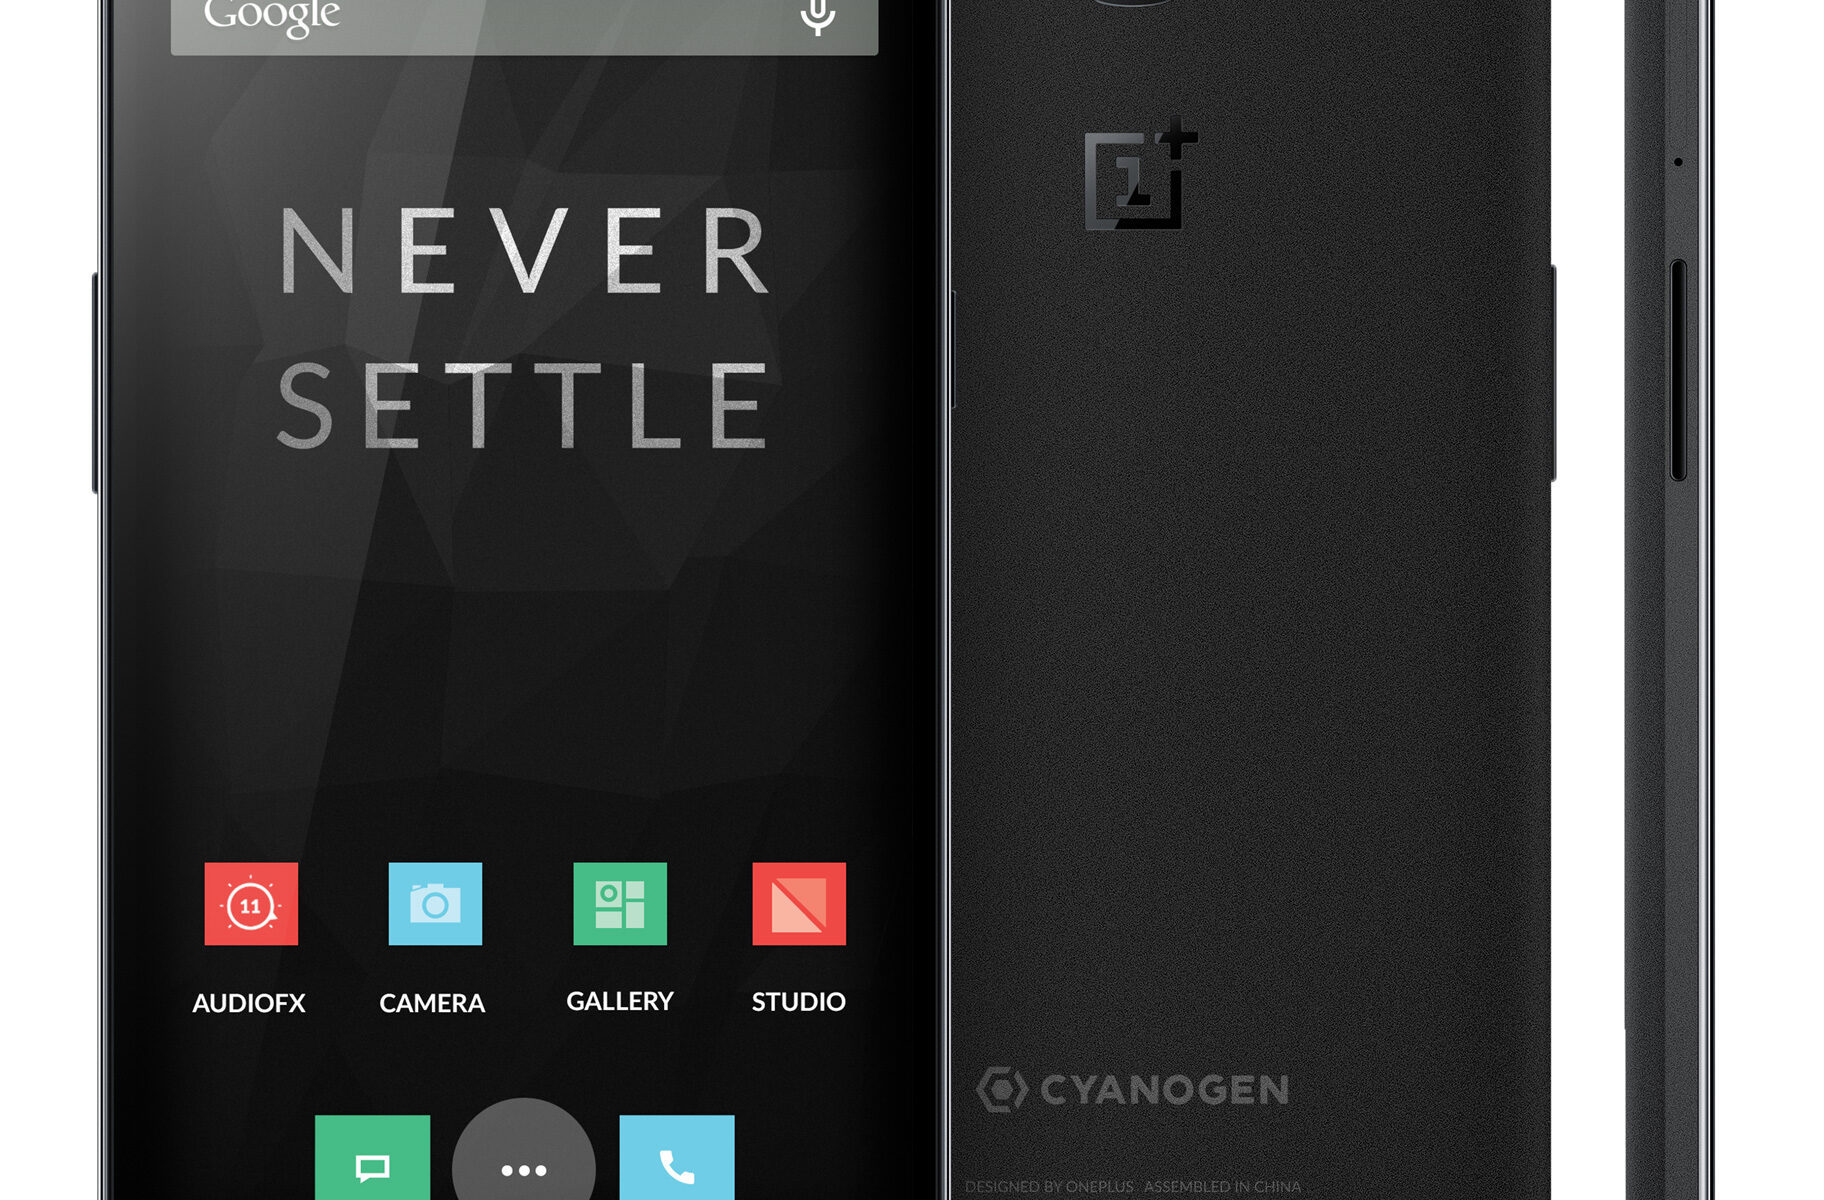
I’ve got 3 invites for the 64 GB Sandstone Black model of the OnePlus One, about to expire on January 1, 2015. Comment or tweet at me.

Fedora 21 was just released earlier this week on December 9, 2014. The biggest change was the separation of the distribution into three “products”:
Of course, as always, OpenStack/KVM and Docker get a lot of love, but Xen and XenServer are once again ignored. This post is my solution. With the prebuilt images distributed here and the kickstart scripts below, you can deploy Fedora 21 on your own XenServer (6.2+).
Continue reading “Fedora 21 on XenServer”
When I first came to Penn, the website for the Nominations & Elections Committee looked like this:
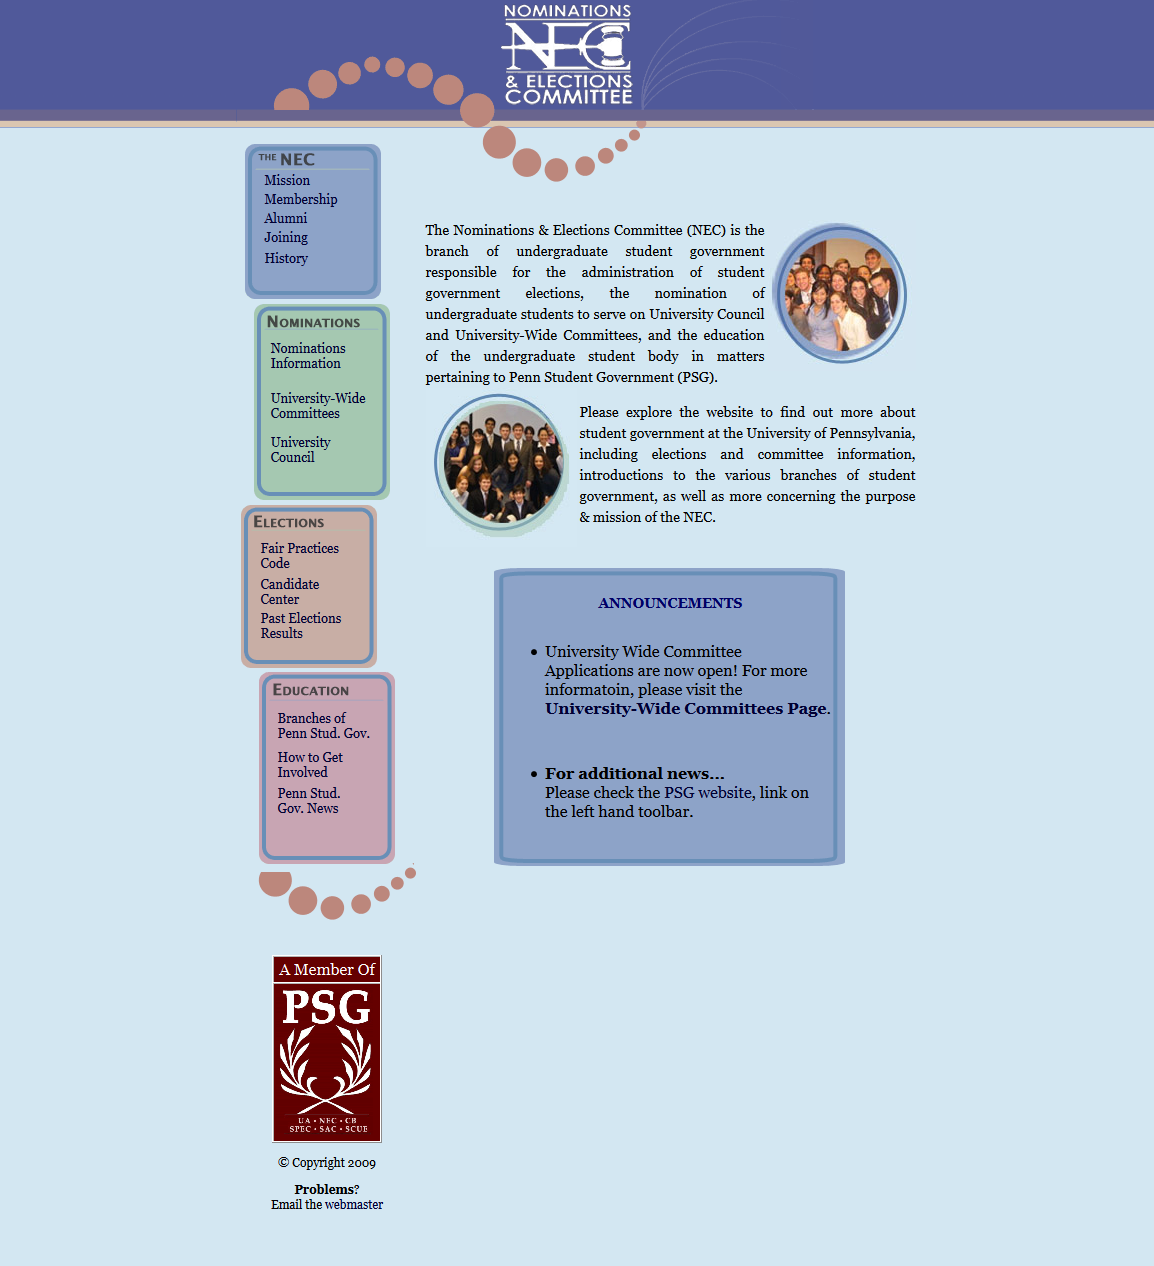
I set out to redevelop and redesign this, upgrading it from a static HTML site edited over SFTP to a WordPress CMS on Canvas. More importantly, the website redesign in 2012 needed to fit the rebranding that Penn underwent that academic year. In other words, I wanted it to look more like the university’s design. (An email to the Communications office responsible for web assets clarified that we could, in fact, do this.)
I am transitioning PGP keys from an old 2048-bit RSA key to a new 8192-bit RSA master key with subkeys.
Continue reading “PGP key transition”

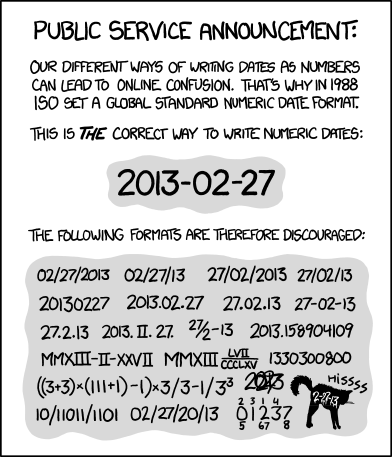
The YYYY-MM-DD format (%Y-%m-%d) is an internationally accepted, and standardized (ISO 8601) date format. The entire ISO 8601 system is based on big-endian ordering (greatest-to-least units) within the string, so… year, month, day, hour, minute, second. It makes a hell lot more sense than the American traditional MM/DD/YY format. So much so, in fact, that ANSI and the National Institute of Standards and Technology (NIST) have both adopted it. In some countries, like China, the traditional format in the language follows the same big-endianness: 2006年1月29日, which spells out 2006-01-29.
The advantage of this format isn’t just for programmers, where sorting dates and times requires no special logic (i.e. 2014-01-31 unambiguously precedes 2014-02-01, even if they were both written without delimiter symbols).
The format also eliminates any confusion between the fields. For instance, though colloquial American 11/12/13 should be interpreted as November 12, __13, it could just as easily pass for December 13, 2011. There is no room for confusion in 2013-11-12.
XKCD says it best:
Now, it’s understandable that maybe Google needs to recognize people’s different formats of entering dates in their colloquial formats, like MM/DD/YY. But there is no excuse not to recognize the YYYY-MM-DD format.
Even more so, because the date in my screenshot, 1995-09-24, has no possible misinterpretation. To any rational human being, there’s no way to think that this is the 9th day of the 24th month (!) of 1995.
Following my previous post on running CentOS 7 and Ubuntu 14.04 as fully-paravirtualized guests on XenServer, I ran some benchmarks to compare the relative performance of fully-paravirtualized (henceforth abbreviated PV) domUs against HVM guests using paravirt drivers and interrupts/timers (henceforth PVHVM).
The performance differences between the two types has been studied for some time. Once upon a time, PV was undoubtedly faster, free of the overhead associated with full hardware emulation. With newer hardware features that have been supported for the last few years, PVHVM, which takes advantage of features in the processor as well as a Linux kernel that recognizes that it is operating as a virtual guest, has surpassed PV performance in most arenas.
Benchmarks have severe limitations. The statistics here are only meant to be compared relatively among themselves—between the PV and PVHVM guests running exactly the same specs and software. It would be a futile exercise to compare them against VMs running on other servers, which might have better SANs, lighter workloads, or faster CPUs and RAM. The specific test profiles in the Phoronix software are also based on outdated versions of Apache httpd and nginx, which makes them unreliable for assessing real-world performance.
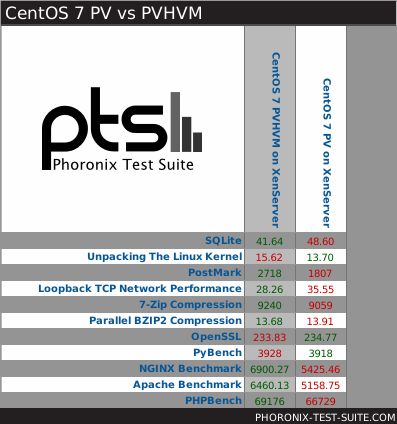
Some of the relevant comparisons:
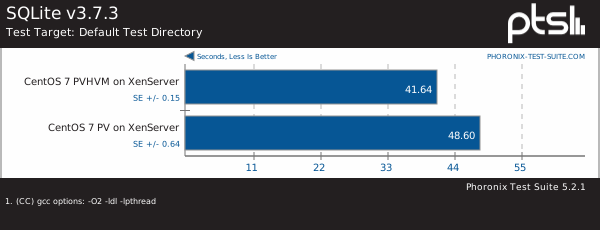
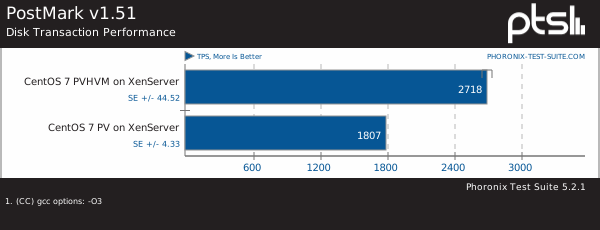
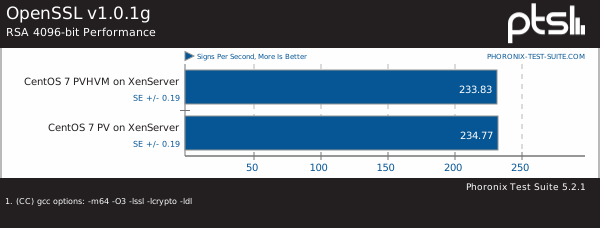
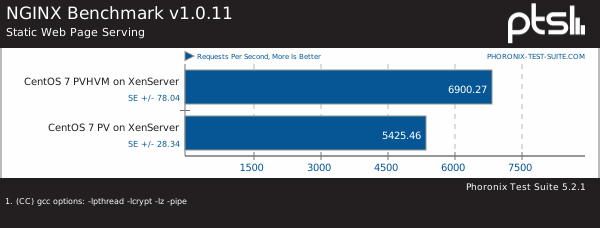
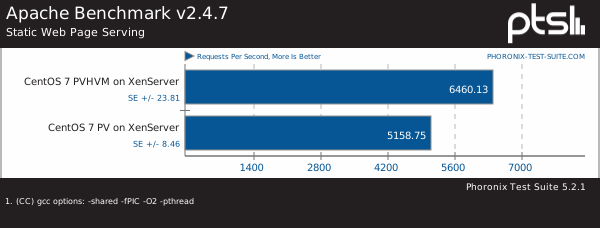
It’s worth noting that CentOS 7 with a 3.10 kernel performed poorly compared to other distributions—both Fedora 20 (kernel 3.15) and Ubuntu 14.04 (kernel 3.13) outperformed CentOS on web serving workloads (not shown). But the evidence pretty conclusively showed that PVHVM generally performed better than PV on all of the operating systems.
Update (2017-04-28): Because these images are now out of date and insecure, the .xva images have been deleted. You should instead use the distribution’s latest cloud images in .qcow2 format, converted for XenServer.
To that end, I’d like to offer a prebuilt CentOS 7.0.1406 image that runs in PVHVM on XenServer. You should feel free to choose between this and the PV version from my previous post, depending on your needs. (If you need to accommodate higher density on your server, you might be better off with PV. Run benchmarks yourself to decide what you should use.)
As before, you can decompress (xz -d ___.xvz.xz or use your GUI of choice) then import through XenCenter (File – Import…) or the command line (xe vm-import filename=___.xva).
This image is provided with no guarantees. Please let me know in the comments if you find an issue with it.
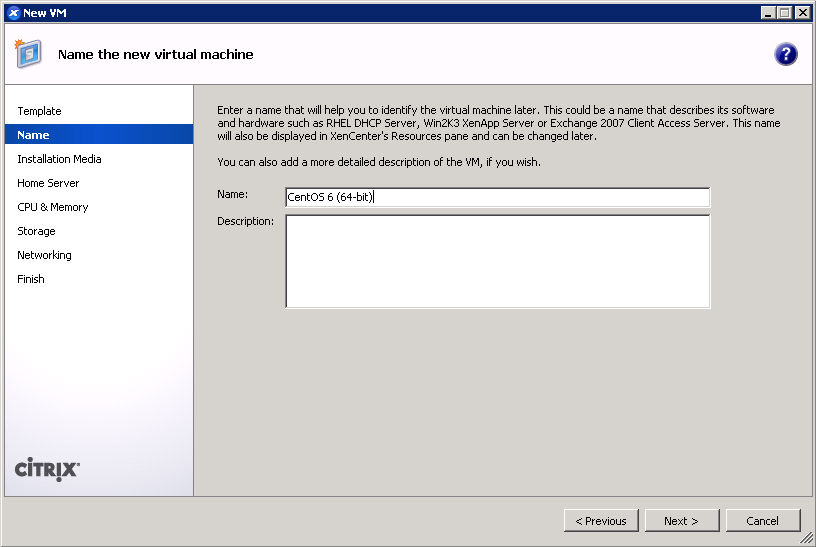
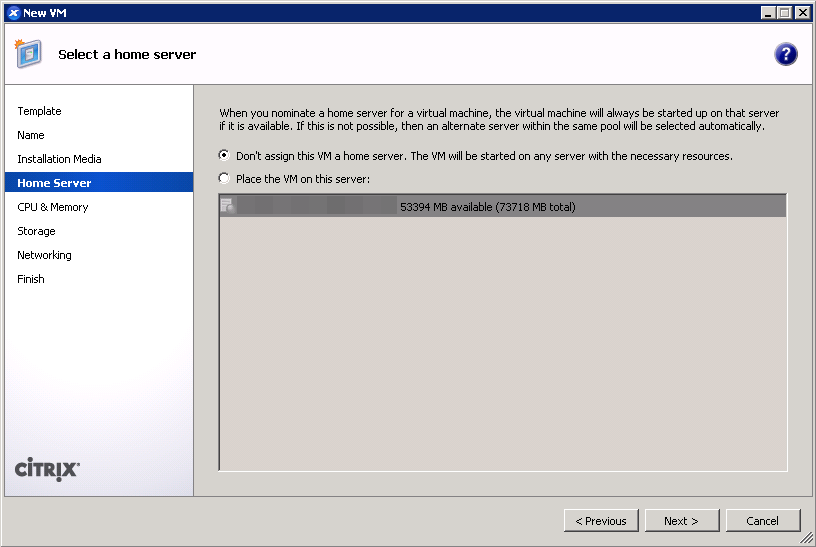
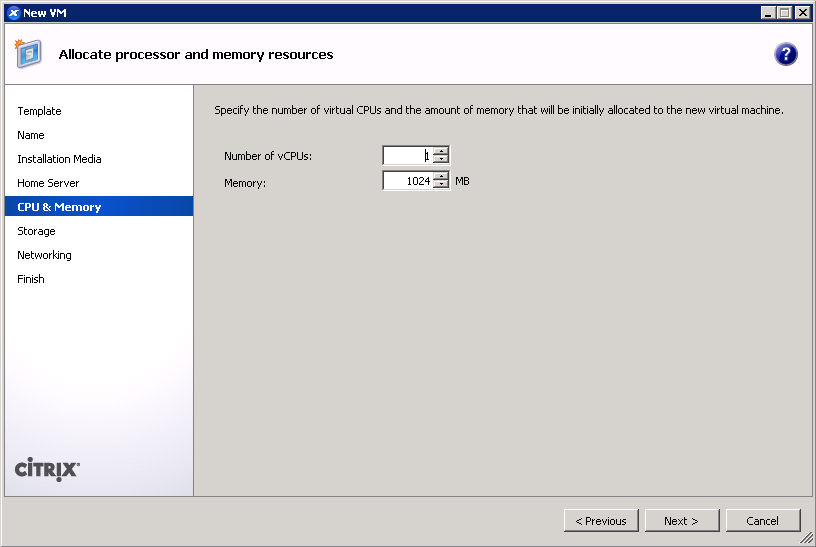
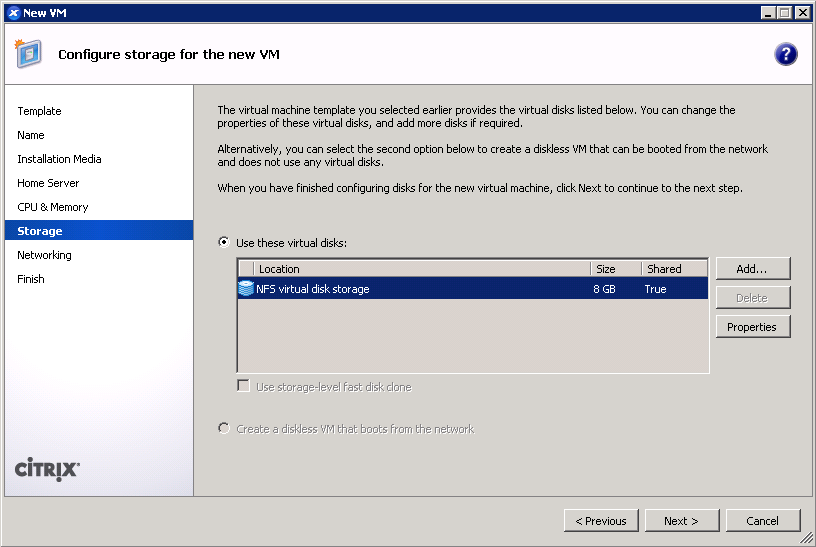
c3ef221ae886cea4c3be09996d0cb2049dc2ac8f10dd5323f85beee25ce9d4cd44583aa3cdbf1db1c62b2db05530ce6fcentosAsdfqwertyA PVHVM system requires no special accommodations when installing, except that UEFI and GPT are not certain to be supported. Merely select the “Other install media” option in XenCenter, and use a standard installer ISO/DVD. Do NOT use any of the CentOS or RHEL templates! Those will create PV guests.
An automated kickstart like the one used to create the image above may help you build a generic template. Hit <Tab> at the CentOS DVD menu and append a ks=__ parameter to use a kickstart script hosted at an HTTP location.
The image above was built with the cent70-server-pvhvm.ks script at revision e278f2a8139fb624bc2cdcd9a80d8b51b7910de3, embedded below. If there are any updates to this script, they will be added to the develop branch on GitHub. You can also edit it yourself before deploying.
[github file=/frederickding/xenserver-kickstart/blob/e278f2a8139fb624bc2cdcd9a80d8b51b7910de3/centos-7.0/cent70-server-pvhvm.ks][/github]
If you were able to use this image or the kickstart, I’d appreciate a brief comment to let me know it worked for you. I’d hope that the bandwidth costs are going to good use!
Update (2015-10-21): since the images below have not been updated since July 2014, I highly recommend that you no longer use them; instead, you should use a kickstart script to install from the latest packages. Also, as I’ve noted in the comments, PVHVM will likely perform better overall. Update (2017-04-28): the .xva files have now been deleted; instead see this new guide for converting .qcow2 cloud images for use with XenServer.
One of the most frequently visited blog posts on my site is a guide to installing paravirtualized Fedora 20 on XenServer using an automated kickstart file. With the recent releases of RedHat Enterprise Linux 7 (and the corresponding CentOS 7 — versioned at 7.0.1406) and Ubuntu 14.04 LTS “Trusty Tahr”, as well as prerelease versions of the next iteration of XenServer, I thought it was time to revisit this matter and show you the scripts for optimized paravirtualized guests running the newest versions of CentOS and Ubuntu.
If you’re lazy, you can skip the process and download prebuilt XenServer images that you can decompress (xz -d ___.xvz.xz or use your GUI of choice) then import through XenCenter (File – Import…) or the command line (xe vm-import filename=___.xva). These images do not have XenServer Tools installed, because you should install them yourself using the tools that match your XenServer version.
These images are provided with no guarantees. Please let me know (comments below are fine) if you find an issue with them.
ab69ee14476120f88ac2f404d7584ebb29f9b38bdf624f1ae123bb45a9f1ed9491e3ce39790b0251f1a1fdfec2d9bef0centosAsdfqwerty1c691324d4e851df9131b6d3e4a081da3a6aee35959ed3defc7f831ead9b40f2e2ed6cfb629f916b9af047a05f8a192dubuntuAsdfqwertyIt’s true that private cloud IaaS tools like OpenStack have been growing in popularity, and increasingly, vendors are distributing cloud images suitable for OpenStack (see Fedora Cloud images). My instructions in the rest of this blog post won’t help you build images for an IaaS platform. You might as well just get the vendor cloud images if you’re going to be using OpenStack.
You can skip down to the next heading if you don’t want to read about my experiences with OpenStack.
I tested out OpenStack + KVM on an HP baremetal server with 12 physical cores and 48 GB of RAM recently. Despite the simplified installation process enabled by RedHat, it didn’t fit my needs, and I went back to using XenServer. OpenStack was a mismatch for my needs and also has a few infrastructural problems, and hopefully someone reading this will be able to tell me if I’m out of my mind or if these are actually legitimate concerns:
That’s when I had enough. Technical benefits of KVM aside, and management capabilities of OpenStack aside, I decided to move firmly back into virtualization territory. XenServer’s minimal dom0 design and light overhead was much more suitable for my needs.
XenServer Creedence alpha 4—the most recent prerelease version that I am using—uses a newer Xen hypervisor and bundled tools. Consequently, it seems to have a patched version of pygrub that can read the CentOS 7 grub.cfg, which uses the keywords linux16 and initrd16, and which is no longer affected by the same parsing bugs on default="${next_entry}" that necessitated the fixes at the end of the post-installation script.
However, XenServer 6.2 cannot handle the out-of-box installation (ext4 /boot partition, GPT, etc) under paravirtualization without additional customization. Kickstart scripts are still the easiest way to ensure that the guests are bootable out of the box, by predefining a working partition scheme, selecting a minimal package set, fixing the bootloader script, and generalizing the installation.
Additionally, XenServer 6.2 lacks a compatible built-in template for Ubuntu 14.04. Thus, it cannot use netboot to install 14.04; you must use the 14.04 server ISO image to install.
I determined that the true minimal @core installation is too minimal for typical needs (it doesn’t come with bind-utils, lsof, zip, etc) so this image is installed with the @base group. About 456 packages are included.
[github file=”/frederickding/xenserver-kickstart/blob/develop/centos-7.0/cent70-server.ks”]
[github file=”/frederickding/xenserver-kickstart/blob/develop/ubuntu-14.04/trusty-server.ks”]
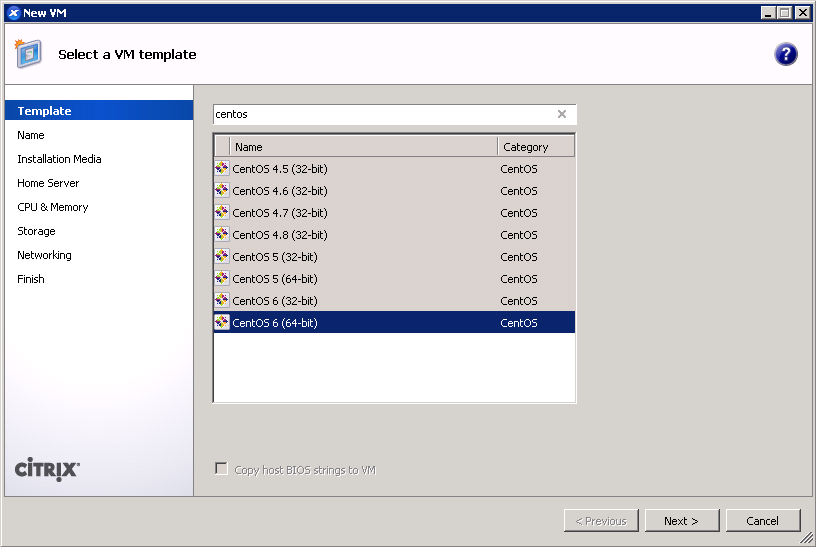
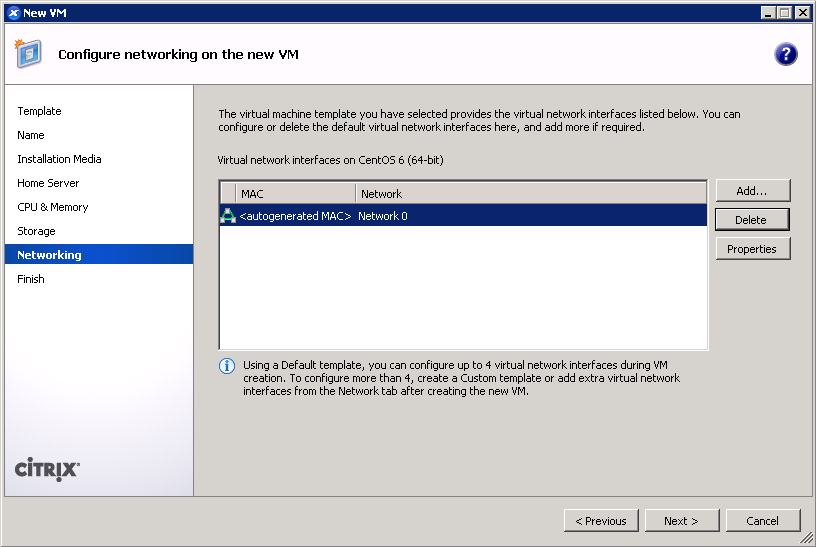
console=hvc0 utf8 nogpt noipv6 ks=https://github.com/frederickding/xenserver-kickstart/raw/develop/centos-7.0/cent70-server.ks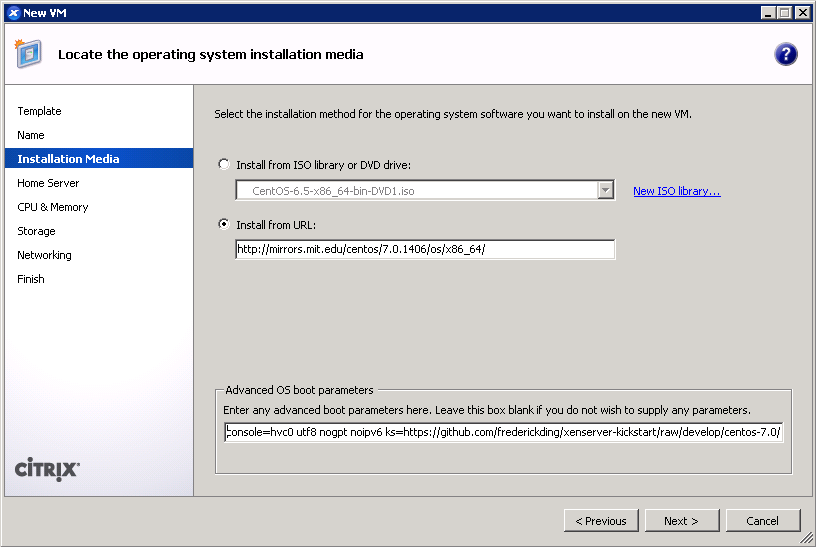
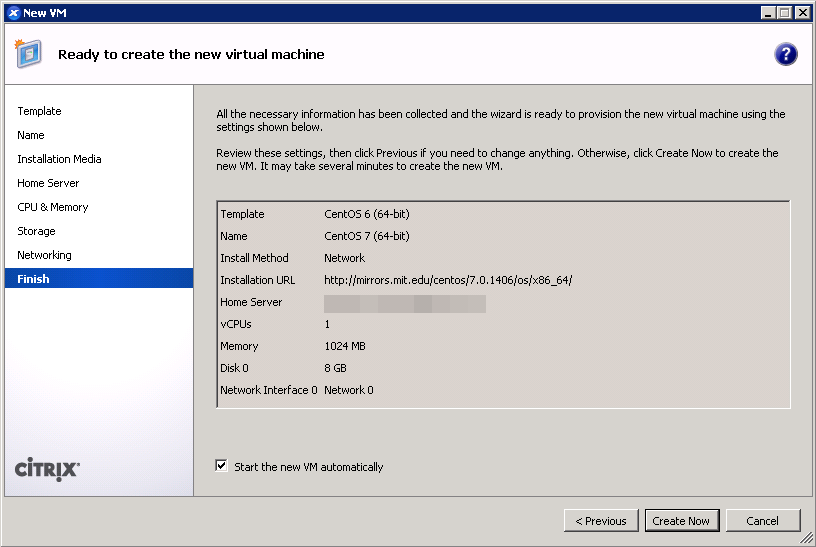
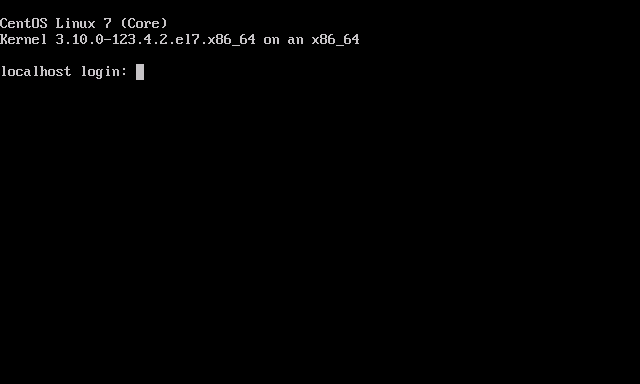
As mentioned above, this process will differ slightly if you are on XenServer 6.2 or older.
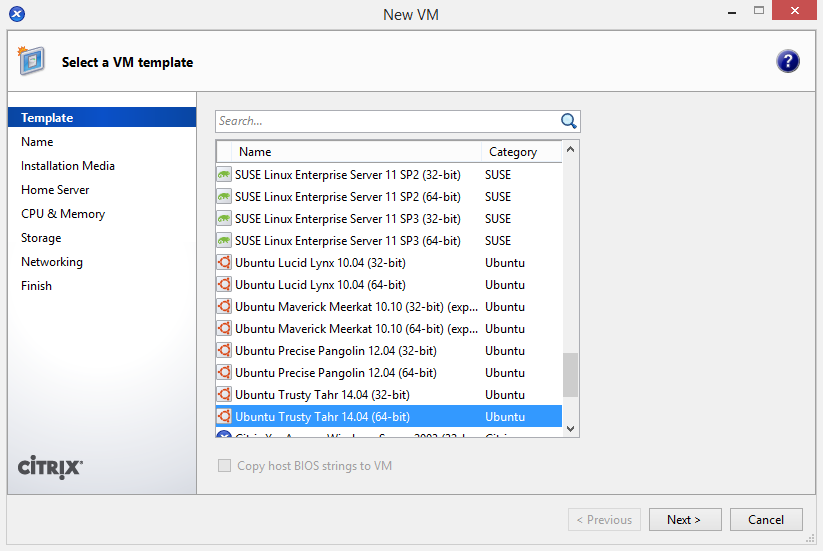 On XenServer 6.2 or older: Use the Ubuntu 12.04 template for a baseline.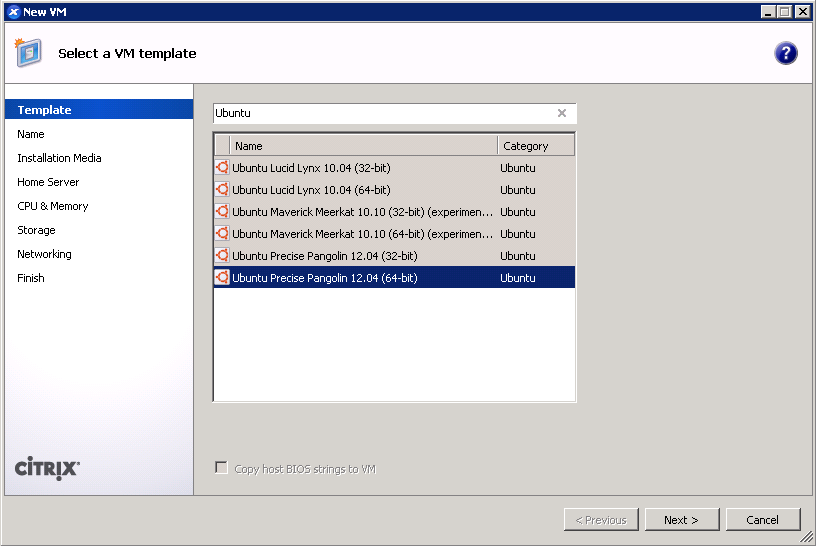
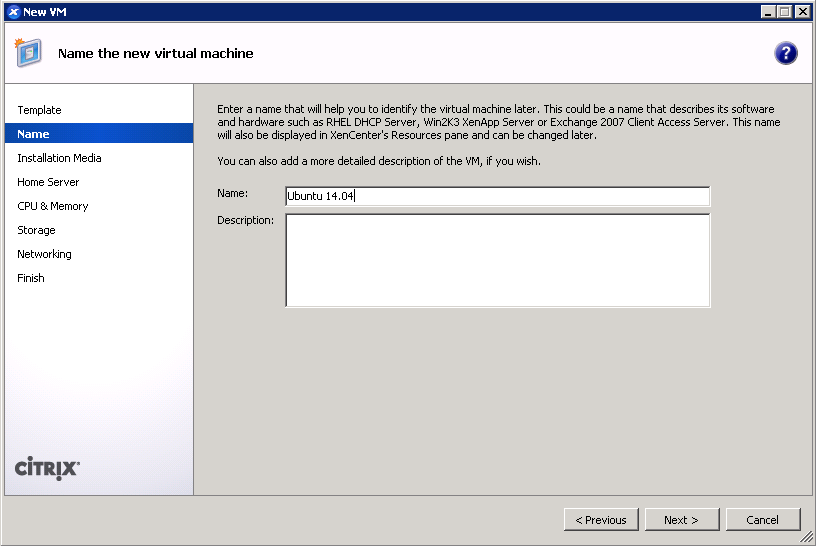
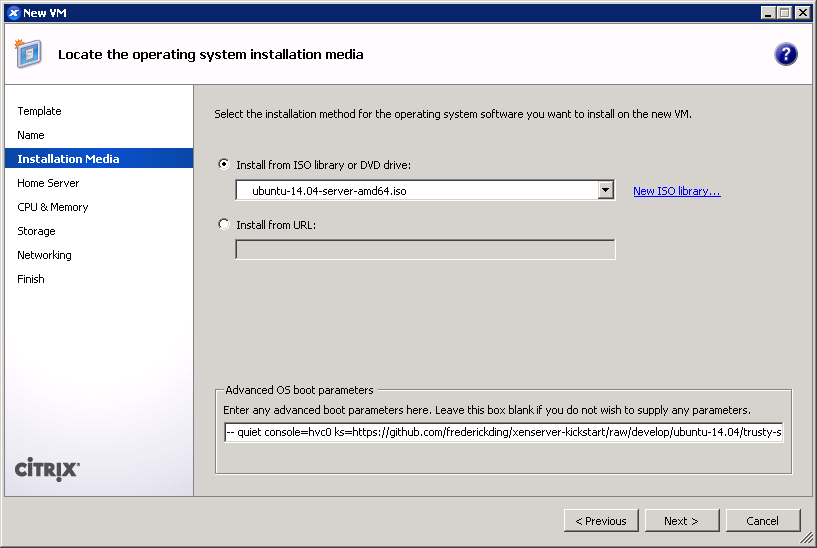 This is also the screen where you specify the boot parameters: append
 ks=https://github.com/frederickding/xenserver-kickstart/raw/develop/ubuntu-14.04/trusty-server.ks to the existing parameters line.Note: if you are warned that Grub is not being installed, you should nevertheless safely proceed with installation.
I recognize that these instructions require the use of a Windows program—XenCenter. I have not tried to conduct this installation using command line tools only. If you are a users without access to a Windows machine from which to run XenCenter, you can nevertheless deploy the kickstart-built XVA images above using nothing more than 2 or 3 commands on the dom0. If anyone can come up with a process to run through a kickstart-scripted installation using the xe shell tools, please feel free to share in the comments below.
I hope this has helped! I welcome your feedback.