
Update (2015-10-21): since the images below have not been updated since July 2014, I highly recommend that you no longer use them; instead, you should use a kickstart script to install from the latest packages. Also, as I’ve noted in the comments, PVHVM will likely perform better overall. Update (2017-04-28): the .xva files have now been deleted; instead see this new guide for converting .qcow2 cloud images for use with XenServer.
One of the most frequently visited blog posts on my site is a guide to installing paravirtualized Fedora 20 on XenServer using an automated kickstart file. With the recent releases of RedHat Enterprise Linux 7 (and the corresponding CentOS 7 — versioned at 7.0.1406) and Ubuntu 14.04 LTS “Trusty Tahr”, as well as prerelease versions of the next iteration of XenServer, I thought it was time to revisit this matter and show you the scripts for optimized paravirtualized guests running the newest versions of CentOS and Ubuntu.
Table of Contents
- Prebuilt images
- OpenStack gripes
- XenServer version differences
- Kickstart scripts
- Installation instructions
Prebuilt images for the lazy
If you’re lazy, you can skip the process and download prebuilt XenServer images that you can decompress (xz -d ___.xvz.xz or use your GUI of choice) then import through XenCenter (File – Import…) or the command line (xe vm-import filename=___.xva). These images do not have XenServer Tools installed, because you should install them yourself using the tools that match your XenServer version.
These images are provided with no guarantees. Please let me know (comments below are fine) if you find an issue with them.
- CentOS 7.0.1406 (as of 2014-07-16)
Filename:centos-7.0.1406-20140716-template.xva.xz
Size:322 MB xz-compressed; 1.6 GB decompressed
Specs:2 vCPUs, 2 GB RAM, 8 GB disk without swap, installed software
SHA256 hash:ab69ee14476120f88ac2f404d7584ebb29f9b38bdf624f1ae123bb45a9f1ed94
MD5 hash:91e3ce39790b0251f1a1fdfec2d9bef0
Username:centos
Password:Asdfqwerty - Ubuntu 14.04 LTS (as of 2014-07-16)
Filename:ubuntu-14.04-20140716-template.xva.xz
Size:549 MB xz-compressed; 1.9 GB decompressed
Specs:2 vCPUs, 2 GB RAM, 8 GB disk including 1 GB swap, installed software
SHA256 hash:1c691324d4e851df9131b6d3e4a081da3a6aee35959ed3defc7f831ead9b40f2
MD5 hash:e2ed6cfb629f916b9af047a05f8a192d
Username:ubuntu
Password:Asdfqwerty
Side note on OpenStack
It’s true that private cloud IaaS tools like OpenStack have been growing in popularity, and increasingly, vendors are distributing cloud images suitable for OpenStack (see Fedora Cloud images). My instructions in the rest of this blog post won’t help you build images for an IaaS platform. You might as well just get the vendor cloud images if you’re going to be using OpenStack.
You can skip down to the next heading if you don’t want to read about my experiences with OpenStack.
OpenStack isn’t right for everyone
I tested out OpenStack + KVM on an HP baremetal server with 12 physical cores and 48 GB of RAM recently. Despite the simplified installation process enabled by RedHat, it didn’t fit my needs, and I went back to using XenServer. OpenStack was a mismatch for my needs and also has a few infrastructural problems, and hopefully someone reading this will be able to tell me if I’m out of my mind or if these are actually legitimate concerns:
- Size of deployment. Even though it can be used on a single baremetal server, OpenStack is optimal for deployments involving larger private clouds with many servers. When working with a single host, the complexity wasn’t worth my time. This is where admins need to judge whether they fall on the virtualization side or the cloud side of a very blurry line.
- Complex networking. Networking in OpenStack using Neutron follows an EC2 model with floating IPs, though there are various “flat” options that will more simply bridge virtual networks. The floating IP model is poorly suited to situations when the public Internet-routable network has an existing external DHCP infrastructure, and no IPs or IP ranges can be reserved.
- Abstraction. From what I could tell, there were ridiculous levels of abstraction. On a single-host node that hosts the block storage service (Cinder) as well as the virtualization host (Nova), an LVM logical volume created by Cinder would be shared as an iSCSI target, mounted by the same machine, and only then exposed to qemu-kvm by the Nova compute service.
- Resource overhead. The way that packstack deployed the software on a CentOS 7 server placed OpenStack—compute service (Nova), block storage (Cinder), object storage (Swift), image storage (Glance), networking (Neutron), identity service (Keystone), and control panel (Horizon)—and all its dependency components—MariaDB, RabbitMQ, memcache, Apache httpd, KVM hypervisor, Open vSwitch, and whatever else I’m forgetting—on the nonvirtualized baremetal operating system. That’s a ton of services, and attack surface, for the host… And the worst part: because each of those programs realized that the server has 48 GB of physical RAM, they all helped themselves to as much as they could grab. MariaDB was configured automatically with huge memory buffers; RabbitMQ seemed to claim more than 3 GB of virtual memory. By the time any virtual guests had been started up, the baremetal system was reporting at least 7-9 GB of used RAM!
That’s when I had enough. Technical benefits of KVM aside, and management capabilities of OpenStack aside, I decided to move firmly back into virtualization territory. XenServer’s minimal dom0 design and light overhead was much more suitable for my needs.
Note your XenServer version
XenServer Creedence requires no fixes
XenServer Creedence alpha 4—the most recent prerelease version that I am using—uses a newer Xen hypervisor and bundled tools. Consequently, it seems to have a patched version of pygrub that can read the CentOS 7 grub.cfg, which uses the keywords linux16 and initrd16, and which is no longer affected by the same parsing bugs on default="${next_entry}" that necessitated the fixes at the end of the post-installation script.
Fixes needed by XenServer 6.2
However, XenServer 6.2 cannot handle the out-of-box installation (ext4 /boot partition, GPT, etc) under paravirtualization without additional customization. Kickstart scripts are still the easiest way to ensure that the guests are bootable out of the box, by predefining a working partition scheme, selecting a minimal package set, fixing the bootloader script, and generalizing the installation.
Additionally, XenServer 6.2 lacks a compatible built-in template for Ubuntu 14.04. Thus, it cannot use netboot to install 14.04; you must use the 14.04 server ISO image to install.
The scripts to do it yourself
CentOS 7
I determined that the true minimal @core installation is too minimal for typical needs (it doesn’t come with bind-utils, lsof, zip, etc) so this image is installed with the @base group. About 456 packages are included.
[github file=”/frederickding/xenserver-kickstart/blob/develop/centos-7.0/cent70-server.ks”]
Ubuntu 14.04:
[github file=”/frederickding/xenserver-kickstart/blob/develop/ubuntu-14.04/trusty-server.ks”]
The process to do it yourself
CentOS 7
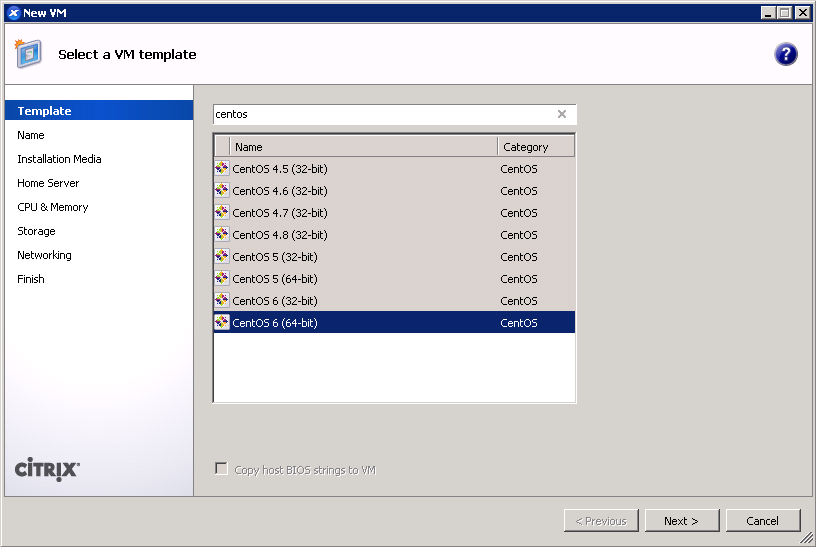
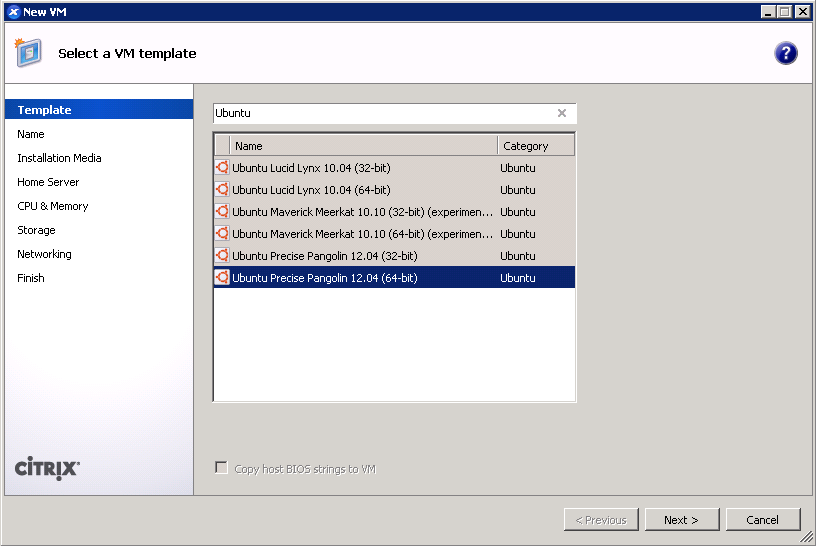
- Use the CentOS 6 template for a baseline.
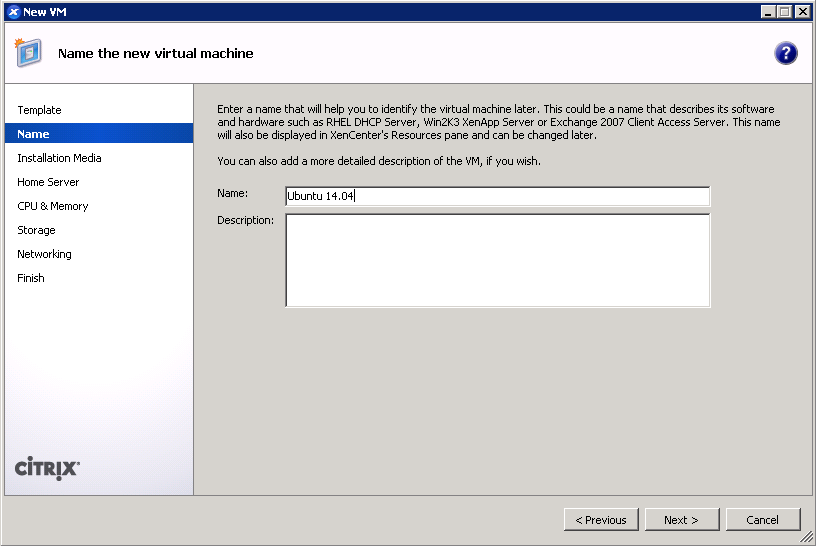
- Give your VM a name. (screenshot)
- IMPORTANT: Boot up a CentOS 7 installer with parameters. You can use the netboot ISO, or boot directly from an HTTP mirror (e.g. http://mirror.rackspace.com/CentOS/7.0.1406/os/x86_64/). This is also the screen where you specify the boot parameters:
console=hvc0 utf8 nogpt noipv6 ks=https://github.com/frederickding/xenserver-kickstart/raw/develop/centos-7.0/cent70-server.ks
Note: you may have to host the kickstart script on your own HTTP server, since occasional issues, possibly SSL-related, have been observed with netboot installers being unable to fetch the raw file through GitHub.

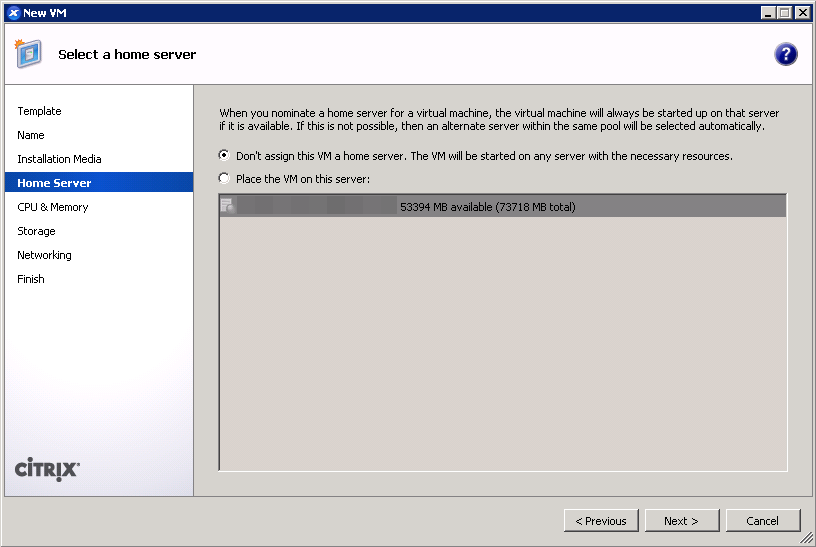
- Set a host server. (screenshot)
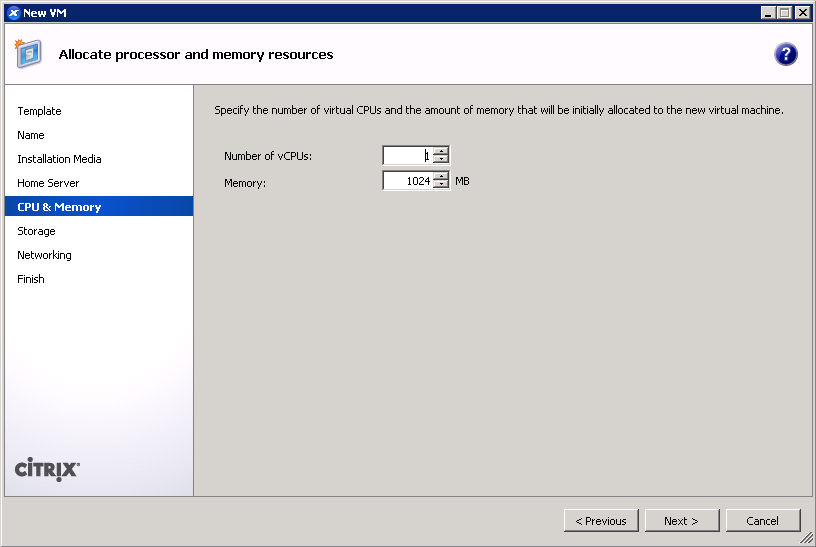
- Assign vCPUs and RAM; Anaconda demands around 1 GB of memory when no swap partition is defined. (screenshot)
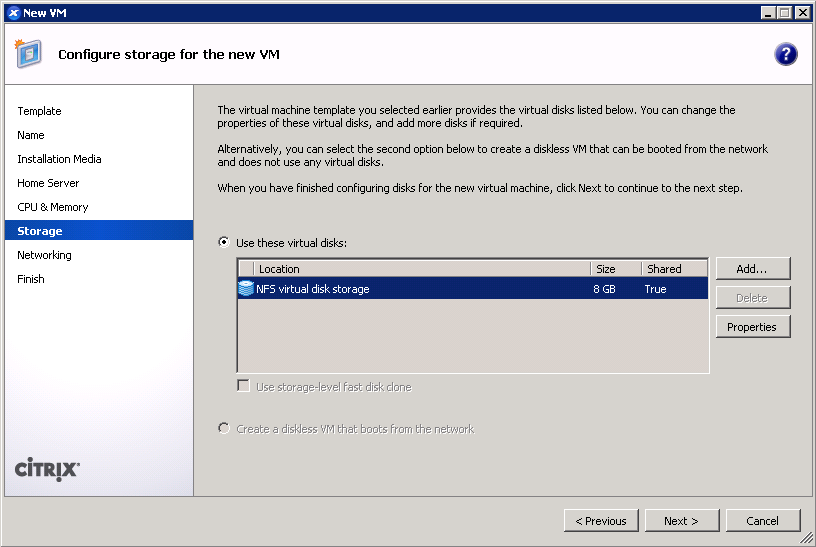
- Create a primary disk for the guest. Realistically, you need only 1-2 GB for the base installation, but XenServer may force you to set a minimum of 8 GB. No matter what size you set here, the kickstart script will make the root partition fill the free space. (screenshot)
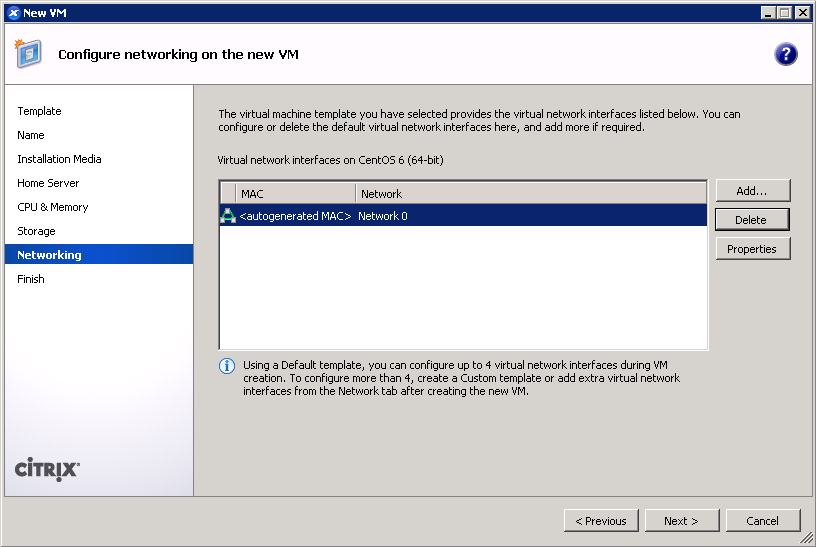
- IMPORTANT: Configure networking for the guest. It’s critical that this works out of the box (i.e. DHCP), since the script asks Anaconda to download packages from the HTTP repositories. (screenshot)
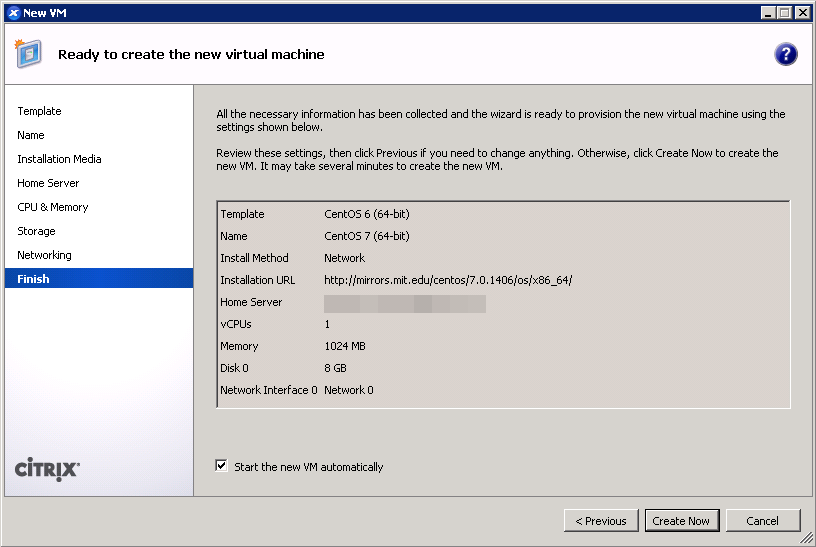
- Finish the wizard and boot up the VM.
- The VM will boot into the CentOS 7 installer, which will run without interaction until it completes.
- Press <Enter> to halt the machine. At this point, you can remove the ISO (if any).
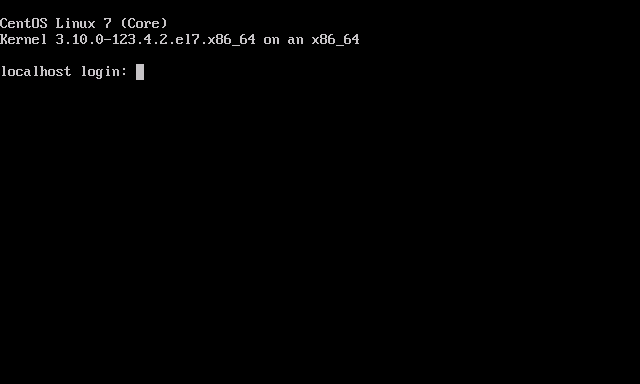
- Boot up the VM. It should go right into the login screen on the command line — from which you can do further configuration as needed.
Ubuntu 14.04
As mentioned above, this process will differ slightly if you are on XenServer 6.2 or older.
- On XenServer Creedence: Use the Ubuntu 14.04 template.
 On XenServer 6.2 or older: Use the Ubuntu 12.04 template for a baseline.
- Give your VM a name. (screenshot)
- IMPORTANT: On any version of XenServer: Boot up the 14.04 server ISO installer with parameters. You cannot use the netboot ISO.
On XenServer Creedence only: You can boot from an HTTP mirror, such as http://us.archive.ubuntu.com/ubuntu/.
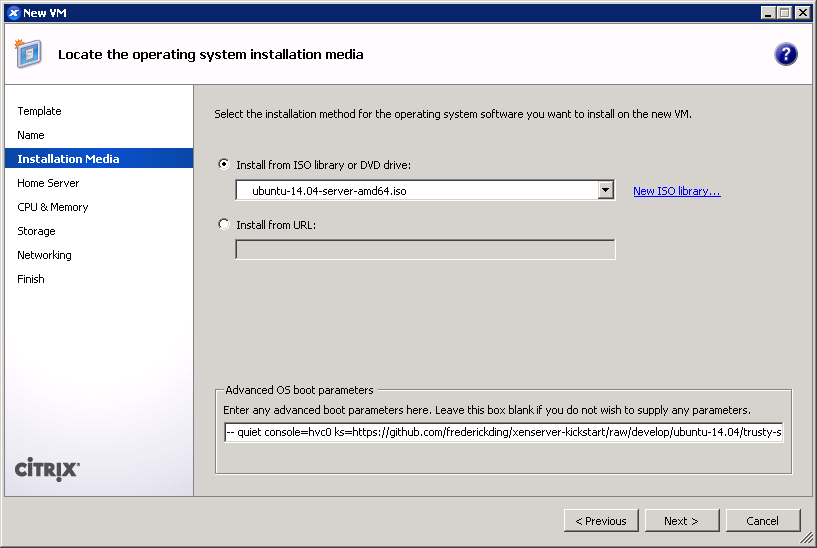 This is also the screen where you specify the boot parameters: append
 ks=https://github.com/frederickding/xenserver-kickstart/raw/develop/ubuntu-14.04/trusty-server.ksto the existing parameters line.
Note: you may have to host the kickstart script on your own HTTP server, since issues, possibly SSL-related, have been observed with netboot installers being unable to fetch the raw file through GitHub. - Set a host server.
- Assign vCPUs and RAM.
- Create a primary disk for the guest. Realistically, you need only about 2 GB for the base installation, but XenServer may force you to set a minimum of 8 GB. No matter what size you set here, the kickstart script will make the root partition fill the free space.
- IMPORTANT: Configure networking for the guest. It’s critical that this works out of the box (i.e. DHCP), since the script asks the installer to download packages from online repositories.
- Finish the wizard and boot up the VM.
- The VM will boot into the Ubuntu installer, which will run without interaction until it completes.
Note: if you are warned that Grub is not being installed, you should nevertheless safely proceed with installation.
- Press <Enter> to halt the machine. At this point, you can remove the ISO (if any).
- Boot up the VM. It should go right into the login screen on the command line — from which you can do further configuration as needed, such as installing XenServer Tools.
Final thoughts
I recognize that these instructions require the use of a Windows program—XenCenter. I have not tried to conduct this installation using command line tools only. If you are a users without access to a Windows machine from which to run XenCenter, you can nevertheless deploy the kickstart-built XVA images above using nothing more than 2 or 3 commands on the dom0. If anyone can come up with a process to run through a kickstart-scripted installation using the xe shell tools, please feel free to share in the comments below.
I hope this has helped! I welcome your feedback.
Thanks for the CentOS 7 update!
Have you tried to install CentOS 7 in XenServer 6.2 using LVM. I cannot get it to work…
From what I understand, there are two conditions that must be satisfied for a system to function under paravirt on XenServer 6.2:
1. It needs to have a valid grub configuration file in the boot directory or partition that uses a filesystem pygrub can read — I’ve found ext3 to work. So a /boot partition using ext3 is needed if you’re going to use LVM.
2. The grub configuration can’t use complex GRUB2 features that pygrub can’t understand. CentOS & RHEL 7 use the keywords linux16 and initrd16, which the XenServer bootloader doesn’t understand (until the next release; it’s been fixed in upstream Xen). A kickstart script is the easiest way to automate the installation, most crucially to fudge these grub fixes.
Oh, and by the way, my own benchmarks have shown far better IO and CPU performance when running PVHVM guests than paravirtualized domUs. CentOS itself performed poorly on my test lab, probably because it’s using the oldest kernel of all the major distros.
If you’re serious about using LVM, the easiest thing to do is use the Other install media option and run CentOS under HVM instead of paravirtualization. You can still benefit from Xen-aware kernel drivers under HVM. There won’t be any need to fudge the bootloader configuration… Just as long as you stick with MBR for now.
Yes, I was using /boot classic partition (ext4), and LVM for / (also ext4). But that doesn’t seems to work.
I will try with HVM, and see how it works.
Thank your very much
As I’ve noted above, an ext4 /boot partition will not work. It would need to be ext3.
I’ve done new CentOS 7 PV installation instructions that work. It’s a fully automated install with LVM.
http://grantmcwilliams.com/item/679-centos7-on-xcp
Thanks Frederick, indeed that was the problem. /boot partition must be ext3.
With CentOS 6 I was using ext4 without problem for the /boot partition, but it doesn’t work for 7.
LVM is fine for PV or HVM.
With PV machines netperf is showing better numbers than with CentOS 6.5 (8138.38MB v6.5 vs 11620.80MB v7.0; local machine test).
Sorry I am a newbie at this. I did the install and found the user centos and pw of Asdfqwerty. How can I find out what the root password is, or can you advise me of the password.
Seems you are quite new to Linux! No worries.
The root password is not set by default. Instead, you have a user (
centosorubuntu) which has escalation privileges. That is, the user is allowed to usesudoto do tasks as if the user is root. Each time* you usesudo, you will be asked for the current user’s password, not the root password. (* there’s a timeout built in so that you won’t be asked again if you recently authenticated) That’s also why you should usepasswdto change your password after installing the image, or create a new user with your own password and delete the default user.All this also means you get to:
sudo passwdto set the root password, so that you can log in as rootsudo suto become root and get a root-privileged terminal using only your non-root (centosorubuntu) passwordThe VMs in this post are configured not to have a root password so as to protect against malicious hackers’ attempts to SSH in as root.
@ Frederick. Thank you for the quick response. I really do appreciate your help. Now on my way to get that new car smell away on Linux. :)
Hey @relevelence, you should consider using the new PVHVM images posted at http://www.frederickding.com/posts/2014/07/pvhvm-centos-7-xenserver-312113/ . CentOS 7 is really slow in full paravirtualization.
Fredrick, Great article! I’ve done a fair bit of CentOS6 on XenServer, but not with kickstart. I used your kickstart script because I was not having success with my previous method. Install finished, but it still failed to boot with a pygrub RuntimeError “line 850” “Unable to find partition containing kernel”. I did make a few edits to the script, mainly to network specifics. Do we need to be on XenServer 6.2? Thanks
Yes, I can only guarantee these scripts on XenServer 6.2 and Creedence. Older versions may not be able to boot from certain partition types. You’ll need a separate /boot partition on ext2 if you are using older XenServer (change the line that makes the /boot partition to use ext2 instead of ext3).
That’s what I suspected. Thanks
Just a quick note to say your kickstart script was a godsend! I struggled to get centos 7 working in Xen all day until I came across your pygrub fix! Many thanks.
This is great but I need to install Gnome and as sudo I cannot do this. Is there a workaround for this?
What do you mean? You can install GNOME under sudo with a package manager. In CentOS:
sudo yum groupinstall "GNOME Desktop"XenServer Creedence versions after alpha 4 have removed the two Ubuntu 14.04 PV templates and replaced them with a single Ubuntu 14.04 which seems to install an HVM machine, much like installing with the “Other install media” option. The current Creedence version is beta 2, which I am using right now.
What would the process be for this scenario?
Would choosing “Install a minimal virtual machine” from the [F4] menu in the installer’s initial menu be the way forward, here?
I am going to try this, but would like to know if there is a way to tell, post installation, just what type of machine I have installed; PV or HVM. This is what annoys me particularly about XenServer and XenCenter: There is no obvious way to tell, or to specify this distinction upon installing.
*TL;DR*
The main reason for this even bothering me is that I have found that PCI devices like storage controllers are passed through differently on PV vs. HVM, with some working on one and not the other. Furthermore, I have noticed that multiple device pass-through via the XAPI ‘xe’ command works on HVM and not PV, even though hot-plugging via the ‘xl’ command works for multiple devices, regardless.
Examples from my notes:
# Passthrough “00:11.0 SATA controller: Advanced Micro Devices, Inc. [AMD/ATI] SB7x0/SB8x0/SB9x0 SATA Controller [AHCI mode] (rev 40)” #
# Passthrough “01:00.0 SATA controller: Marvell Technology Group Ltd. 88SE9230 PCIe SATA 6Gb/s Controller (rev 10)” #
# Passthrough “05:00.0 RAID bus controller: Silicon Image, Inc. SiI 3132 Serial ATA Raid II Controller (rev 01)” #
# Passthrough “09:00.0 Multimedia controller: Philips Semiconductors SAA7160 (rev 02)” #
[root@Server ~]# xe vm-param-set other-config:pci=0/0000:00:11.0,0/0000:01:00.0,0/0000:05:00.0,0/0000:09:00.0 uuid=2ec3b16c-5cf7-23a6-5f92-5401b6024166
[root@Server ~]# xe vm-param-list uuid=2ec3b16c-5cf7-23a6-5f92-5401b6024166 | grep other-config
other-config (MRW): pci: 0/0000:00:11.0,0/0000:01:00.0,0/0000:05:00.0,0/0000:09:00.0;
vgpu_pci: 0/0000:07:00.0,1/0000:07:00.1; base_template_name: Other install media; mac_seed: 49735cec-8980-eb09-97d4-05c1ca1ebde7;
install-methods: cdrom
# Passthrough “09:00.0 Multimedia controller: Philips Semiconductors SAA7160 (rev 02)” #
[root@Server ~]# xl list
Name ID Mem VCPUsStateTime(s)
Domain-0 0 2046 4 r—– 250.8
Ubuntu Trusty Tahr 14.04 (64-bit) (1) 10 2048 2 -b—- 5.9
http://blog.xen.org/index.php/2012/06/04/xen-4-2-preview-xl-and-pci-pass-through/
NB: Devices will only become available after you have previously passed them through using
xe vm-param-set other-config:pci=
[root@Server ~]# xl pci-assignable-list
0000:00:11.0
0000:07:00.0
0000:07:00.1
0000:09:00.0
[root@Server ~]# xl pci-attach 10 09:00.0 1
Thanks for your post, it was very helpful.
While trying to install xen-tools, I got this error:
[centos@localhost Linux]$ ./install.sh
Fatal Error: Failed to determine Linux distribution and version
I’ve installed manually with the following steps:
1) Mount dvd
sudo mount -r -t iso9660 /dev/xvdd /mnt/dvd
2) Install xentools
sudo rpm -i /mnt/dvd/Linux/xe-guest-utilities-6.2.0-1120.x86_64.rpm
3) Reboot
sudo reboot
It worked!
Great article, thanks. How is possible to understand, when I use PV and when HVM mode? Is this possible by using PV-bootloader=pygrub and HVM-boot-policy=BIOS\ order?
Thanks
You can determine the type of virtualization using the flags you just mentioned. If PV-bootloader is set to pygrub, you’re certainly using paravirtualization; if HVM-boot-policy is set to that, you’re probably using HVM. You can also check from inside the VM:
lscpu. If it showsVirtualization type: full, you’re using (PV)HVM. If it showsVirtualization type: para, you’re using PV.dmidecode -s system-product-name. If you are on (PV)HVM, it will displayHVM domU.PV or PVHVM: which to choose?
Whether you choose to deploy PV or PVHVM depends on (a) the physical hardware you’re using, (b) the type of workload (e.g. I/O-limited, or CPU-limited) you’re running within the VMs, and (c) the kernel/software used within the VM. I ran some primitive benchmarks comparing CentOS 7 under PV and PVHVM on a dual-CPU Xeon system and comparing Fedora 20 under PV and PVHVM, showing that, in general, you’ll get better CPU performance under PVHVM.
Converting from one to the other
Note that the images I’ve prepared for PV lack packages that may be necessary for proper function under PVHVM. See my PVHVM guide instead. PVHVM -> PV is an easier conversion than PV -> PVHVM.
Fatal Error: Failed to determine Linux distribution and version
Install Xentools manually
1. Attach the xs-tools.iso
1. $ sudo mount /dev/xvdd /mnt
2. $ sudo yum localinstall /mnt/Linux/xe-guest-utilities-*_64.rpm
3. $ sudo umount /mnt
4. Detach the xs-tools.iso
Hi Frederick,
I’m stuck with an Ubuntu installation.
In the first place, I tried to install Ubuntu 14.04 from iso image on Xenserver 6.5 with no success, though it should be supported in this XenServer version and a dedicated template is present. Unfortunately I cannot use the network install with kickstart because of some network configuration constraint. So I downloaded your prebuilt image, extracted and imported. The import command seems to work and returns the uuid of the task but the task then stays “pending” at 0% progress (it’s about one hour now)… Some hint?
Thank you
S
It sounds like you’re working on the command line, right?
xe vm-importshould not return the UUID of a task. It should return the UUID of the VM or template that was successfully imported.Here’s what that process should have looked like:
1. Decompress the XZ archive.
2. Import with
xe vm-import.The UUID returned should be randomly generated.
3. Verify that the template exists.
[root@lightning templates]# xe template-list uuid=5032a3b3-15a1-fefa-6c34-4eac9ddfb8b4
uuid ( RO)                : 5032a3b3-15a1-fefa-6c34-4eac9ddfb8b4
          name-label ( RW): Ubuntu 14.04 PVHVM Template
    name-description ( RW):
In XenCenter, you’ll see the template as well.
In any case, you should probably avoid using PV guests at this point. PVHVM will be better.
OK! can you lemme know now how can I increase the HDD of VM? All tutorials on web
Hi, can you tell us the root password you set for Centos ?
Sorry, i’ve just forget to read the response already given.
I am trying to use your example to rename the virtual machine /etc/hostname
when does that script run, during install or are we supposed to run it manually afterwards?
If you’re using this script to name the VM using its XenServer hostname, it is not executed automatically per the kickstart above. That’s because it depends on having XenServer Tools installed, to retrieve the data from the virtualization host.
However, if you are simply trying to set the hostname, you should be able to do that in the post-install script within the kickstart. Instead of downloading that script, just echo your desired FQDN to /etc/hostname (e.g.
echo glorious.example.com > /etc/hostname).It is worth noting that CentOS 7 should have the
hostnamectlutility. After the machine has been booted, it seems to be preferable to use thehostnamectlutility to set the instance hostname.This article was really helpful for us resolving some issues with PV 14.04 on XenServer 6.2.
Now i try to run Ubuntu Server 16.04 on XenServer (still) 6.2. Have you tried that?
The VM is booting but i get no image in XenCenter. Maybe due hvc0 is not available.
I also created a bug report: https://bugs.launchpad.net/ubuntu/+source/systemd/+bug/1587009
So what PV does is send the TTY to a virtualized serial port that XenServer eventually puts on the management console. In previous kernels/distros, that device shows up as
/dev/hvc0inside the guest. (FYI, on the dom0, you can usexl console [vm friendly name]to get to the same thing.)I recently tested a CentOS 7 HVM installation and tried to output to that same serial console (yes, you can do this from inside a HVM guest too). It didn’t work. Through trial and error, I discovered that the virtualized serial port is now actually
/dev/ttyS0… so if you’ve had trouble using hvc0, try ttyS0.