
I was experimenting with configuration management tools, and wanted to set up a Puppet master node for my virtualized machines.
It is unfortunate that most guides out there today are tailored specifically for Ubuntu, or rely on prepackaged DEBs that do all the work (which, obviously, don’t really help on CentOS/Fedora/RedHat). This guide on DigitalOcean for setting up a Puppet master on Ubuntu 14.04 is pretty solid, but my own preferences are for CentOS and Fedora. Furthermore, I have completely migrated to using nginx in all my servers, though many deployment guides for Puppet still use Apache and Passenger. And the closest I could find in a guide for CentOS 6, nginx, and Unicorn used SysVinit and God… which are unnecessary now that systemd has been adopted.
(If you’re not as picky, just use Foreman Installer. It’ll take care of everything… even on CentOS 7.)
This guide will use:
- CentOS 7 (at the time of writing, latest release)
- systemd
- nginx 1.7.x (mainline, from official nginx repository)
- Unicorn
- Puppet open source 3.7.x
So, here are the steps I’ve taken. I actually didn’t do them in this exact order, but I’ve reordered my steps to something more logical that you can follow along.
0. Start with CentOS 7.
I’ll presume that you’ve already deployed a CentOS 7 host or virtual machine with the hostname of puppet. We’ll use the example.com domain, so that the FQDN of the machine is puppet.example.com. If you’re on XenServer, you can use one of my prepackaged images to boot up the OS. You can follow the rest of the guide as root, or use sudo.
1. Set up yum repo, install puppet-server.
Import the official Puppet repository RPM.
yum install http://yum.puppetlabs.com/puppetlabs-release-el-7.noarch.rpm
Now, install the actual master. Accept the prompts (including the ones about GPG keys).
yum install puppet-server
Do not start the services yet.
2. Configure basic settings for puppet server.
Most of the details in the official guide’s post-install page apply here.
Set up the hostname of your server in the puppet configuration.
In the [main] section of the /etc/puppet/puppet.conf file, add a dns_alt_names line. Obviously, replace example.com with your network’s DNS suffix.
dns_alt_names = puppet,puppet.example.com
Initialize the certificate authority and let Puppet generate the CA and host certificates:
puppet master --verbose --no-daemonize
Once it spits out “Notice: Starting Puppet master version …”, use Ctrl+C to kill the process. If everything went right, your X.509 certs now exist at /var/lib/puppet/ssl/certs/.
Optional: set up basic environment, modules.
You should make a placeholder manifest. At this point, you might find it helpful also to configure a production environment in Puppet.
touch /etc/puppet/manifests/site.pp
mkdir -p /etc/puppet/environments/production/{manifests,modules}
I’m not sure if the following line is necessary, but it can’t hurt. Add this declaration to your /etc/puppet/puppet.conf file, in the [main] section.
environmentpath = $confdir/environments
You can now feel free to install some basic modules from the Forge, like puppetlabs/stdlib. As an example:
[root@puppet puppet]# puppet module install puppetlabs-stdlib
Notice: Preparing to install into /etc/puppet/environments/production/modules ...
Notice: Downloading from https://forgeapi.puppetlabs.com ...
Notice: Installing -- do not interrupt ...
/etc/puppet/environments/production/modules
└── puppetlabs-stdlib (v4.5.0)
You can return to doing this later; it’s not important for the guide.
3. Install nginx and Unicorn.
Add the following to a new file as /etc/yum.repos.d/nginx.repo:
[nginx]
name=nginx repo
baseurl=http://nginx.org/packages/mainline/centos/7/$basearch/
gpgcheck=0
enabled=1
Install some packages.
yum install nginx rubygems make gcc ruby-devel
# notice that the next two are gem, not yum
gem install rack
gem install unicorn
4. Configure Rack and Unicorn.
Copy the default rack configuration file and set its owner.
cp /usr/share/puppet/ext/rack/config.ru /etc/puppet/
chown puppet:puppet /etc/puppet/config.ru
From Mike Hulsman’s guide for CentOS 6: create a configuration at /etc/puppet/unicorn.conf as follows:
  worker_processes 8
    working_directory "/etc/puppet"
    listen '/var/run/puppet/puppetmaster_unicorn.sock', :backlog => 512
    timeout 120
    pid "/var/run/puppet/puppetmaster_unicorn.pid"

    preload_app true
    if GC.respond_to?(:copy_on_write_friendly=)
      GC.copy_on_write_friendly = true
    end

    before_fork do |server, worker|
      old_pid = "#{server.config[:pid]}.oldbin"
      if File.exists?(old_pid) && server.pid != old_pid
        begin
          Process.kill("QUIT", File.read(old_pid).to_i)
        rescue Errno::ENOENT, Errno::ESRCH
          # someone else did our job for us
        end
      end
    end
And once again fix the owner:
chown puppet:puppet /etc/puppet/unicorn.conf
touch /var/log/unicorn_stderr.log
chown puppet:puppet /var/log/unicorn_stderr.log
Now, test the configuration by launching /usr/local/bin/unicorn -c /etc/puppet/unicorn.conf. (Note that the path to Unicorn is /usr/local/bin, which may not be on the path of the root user.) You’ll see something like the following, at which point you can Ctrl+C to quit (hence the last line).
[root@puppet puppet]# /usr/local/bin/unicorn -c /etc/puppet/unicorn.conf
I, [2015-01-06T23:06:52.571194 #12505]  INFO -- : Refreshing Gem list
I, [2015-01-06T23:06:54.236632 #12505]  INFO -- : unlinking existing socket=/var/run/puppet/puppetmaster_unicorn.sock
I, [2015-01-06T23:06:54.236983 #12505]  INFO -- : listening on addr=/var/run/puppet/puppetmaster_unicorn.sock fd=10
I, [2015-01-06T23:06:54.238916 #12513]  INFO -- : worker=0 spawned pid=12513
I, [2015-01-06T23:06:54.239788 #12516]  INFO -- : worker=1 spawned pid=12516
I, [2015-01-06T23:06:54.240669 #12513]  INFO -- : worker=0 ready
I, [2015-01-06T23:06:54.241385 #12516]  INFO -- : worker=1 ready
I, [2015-01-06T23:06:54.242679 #12519]  INFO -- : worker=2 spawned pid=12519
I, [2015-01-06T23:06:54.243646 #12522]  INFO -- : worker=3 spawned pid=12522
I, [2015-01-06T23:06:54.244376 #12519]  INFO -- : worker=2 ready
I, [2015-01-06T23:06:54.245202 #12522]  INFO -- : worker=3 ready
I, [2015-01-06T23:06:54.246922 #12525]  INFO -- : worker=4 spawned pid=12525
I, [2015-01-06T23:06:54.247985 #12528]  INFO -- : worker=5 spawned pid=12528
I, [2015-01-06T23:06:54.248641 #12525]  INFO -- : worker=4 ready
I, [2015-01-06T23:06:54.249586 #12528]  INFO -- : worker=5 ready
I, [2015-01-06T23:06:54.250571 #12531]  INFO -- : worker=6 spawned pid=12531
I, [2015-01-06T23:06:54.251047 #12505]  INFO -- : master process ready
I, [2015-01-06T23:06:54.251909 #12534]  INFO -- : worker=7 spawned pid=12534
I, [2015-01-06T23:06:54.252233 #12531]  INFO -- : worker=6 ready
I, [2015-01-06T23:06:54.253464 #12534]  INFO -- : worker=7 ready
^CCanceling startup
Great! Almost done.
5. Configure nginx.
Once again, we borrow heavily from Mike Hulsman’s guide here. Be sure to replace puppet.example.com below with your actual FQDN, or whatever the filename of the generated certificate is. It might not be what you think it is, if DHCP has assigned a different DNS suffix.
Create a file at /etc/nginx/conf.d/puppetmaster.conf with these contents:
upstream puppetmaster_unicorn {
    server unix:/var/run/puppet/puppetmaster_unicorn.sock fail_timeout=0;
}

server {
    listen 8140;

    ssl on;
    ssl_session_timeout 5m;
    ssl_certificate /var/lib/puppet/ssl/certs/puppet.example.com.pem;
    ssl_certificate_key /var/lib/puppet/ssl/private_keys/puppet.example.com.pem;
    ssl_client_certificate /var/lib/puppet/ssl/ca/ca_crt.pem;
    ssl_ciphers SSLv2:-LOW:-EXPORT:RC4+RSA;
    #ssl_verify_client on;
    ssl_verify_client optional;

    root /usr/share/empty;

    proxy_set_header Host $host;
    proxy_set_header X-Real-IP $remote_addr;
    proxy_set_header X-Forwarded-For $proxy_add_x_forwarded_for;
    proxy_set_header X-Client-Verify $ssl_client_verify;
    proxy_set_header X-Client-DN $ssl_client_s_dn;
    proxy_set_header X-SSL-Issuer $ssl_client_i_dn;
    proxy_read_timeout 120;

    location / {
        proxy_pass http://puppetmaster_unicorn;
        proxy_redirect off;
    }
}
A quick test with nginx -t as root will check if you gave the right paths. For example:
[root@puppet puppet]# nginx -t
nginx: the configuration file /etc/nginx/nginx.conf syntax is ok
nginx: configuration file /etc/nginx/nginx.conf test is successful
Add an SELinux module to permit nginx to communicate with Unicorn!
This is the one step that might give people grief, since the Unicorn socket is created in a location that is tagged with the puppet_var_run_t SELinux type. Do not simply disable SELinux or put it in permissive mode! This module will allow nginx the permissions it needs to access the socket file that Unicorn uses.
First, install some necessary tools. They might actually already be installed.
yum install policycoreutils-python
Create a file, anywhere (even /tmp should be fine), with the filename nginx_puppetmaster.te and the following contents.
module nginx_puppetmaster 1.0;

require {
        type httpd_t;
        type puppet_var_run_t;
        type init_t;
        class dir search;
        class sock_file { getattr write open append };
        class unix_stream_socket connectto;
}

#============= httpd_t ==============
allow httpd_t puppet_var_run_t:dir search;
allow httpd_t puppet_var_run_t:sock_file { getattr write open append };
allow httpd_t init_t:unix_stream_socket connectto;
Compile this SELinux module using the checkmodule command.
checkmodule -M -m -o nginx_puppetmaster.mod nginx_puppetmaster.te
Then package and install it:
semodule_package -o nginx_puppetmaster.pp -m nginx_puppetmaster.mod
# the next line is the only command that requires root permissions
sudo semodule -i nginx_puppetmaster.pp
You should be good to go!
6. Configure systemd to launch and manage Unicorn.
This is an area where we deviate significantly from the CentOS 6 guide. There should be no need for God when we have systemd to manage Unicorn directly. I took some hints from GitLab’s Unicorn systemd service file to come up with this.
Create a file at /etc/systemd/system/puppetmaster-unicorn.service with these contents:
[Unit]
Description=Puppet Master Unicorn Server

[Service]
User=puppet
Type=forking
WorkingDirectory=/etc/puppet
SyslogIdentifier=puppetmaster-unicorn
PIDFile=/var/run/puppet/puppetmaster_unicorn.pid
MemoryAccounting=true
MemoryLimit=512M
Restart=on-failure
RestartSec=10s

ExecStart=/usr/local/bin/unicorn -D -c /etc/puppet/unicorn.conf
ExecReload=/bin/kill -s USR2 $MAINPID
ExecStop=/bin/kill -s QUIT $MAINPID

[Install]
WantedBy=multi-user.target
Load it into systemd by executing
systemctl daemon-reload
7. Launch the daemons and test!
Begin with Unicorn.
systemctl start puppetmaster-unicorn
systemctl start nginx
If all went well, you should be able to use systemctl status puppetmaster-unicorn to verify that it has launched. Example output:
[root@puppet system]# systemctl status puppetmaster-unicorn.service
puppetmaster-unicorn.service - Puppet Master Unicorn Server
   Loaded: loaded (/etc/systemd/system/puppetmaster-unicorn.service; disabled)
   Active: active (running) since Tue 2015-01-06 23:40:58 UTC; 6s ago
  Process: 13626 ExecStart=/usr/local/bin/unicorn -D -c /etc/puppet/unicorn.conf (code=exited, status=0/SUCCESS)
 Main PID: 13631 (unicorn)
   CGroup: /system.slice/puppetmaster-unicorn.service
           ├─13631 unicorn master -D -c /etc/puppet/unicorn.conf
           ├─13659 unicorn worker[0] -D -c /etc/puppet/unicorn.conf
           ├─13662 unicorn worker[1] -D -c /etc/puppet/unicorn.conf
           ├─13665 unicorn worker[2] -D -c /etc/puppet/unicorn.conf
           ├─13668 unicorn worker[3] -D -c /etc/puppet/unicorn.conf
           ├─13671 unicorn worker[4] -D -c /etc/puppet/unicorn.conf
           ├─13674 unicorn worker[5] -D -c /etc/puppet/unicorn.conf
           ├─13677 unicorn worker[6] -D -c /etc/puppet/unicorn.conf
           └─13680 unicorn worker[7] -D -c /etc/puppet/unicorn.conf

Jan 06 23:40:58 puppet.example.com puppet-master[13631]: Starting Puppet master version 3.7.3
Jan 06 23:40:58 puppet.example.com systemd[1]: Started Puppet Master Unicorn Server.
nginx should also show as running, though in at least one test it failed to start the first time, but worked the second.
[root@puppet system]# systemctl status nginx
nginx.service - nginx - high performance web server
   Loaded: loaded (/usr/lib/systemd/system/nginx.service; disabled)
   Active: active (running) since Tue 2015-01-06 23:21:43 UTC; 23min ago
     Docs: http://nginx.org/en/docs/
 Main PID: 12974 (nginx)
   CGroup: /system.slice/nginx.service
           ├─12974 nginx: master process /usr/sbin/nginx -c /etc/nginx/nginx.conf
           └─12975 nginx: worker process

Jan 06 23:21:42 puppet.example.com nginx[12970]: nginx: the configuration file /etc/nginx/nginx.conf syntax is ok
Jan 06 23:21:42 puppet.example.com nginx[12970]: nginx: configuration file /etc/nginx/nginx.conf test is successful
Jan 06 23:21:43 puppet.example.com systemd[1]: Started nginx - high performance web server.
If both daemons have started, you should try curl -k https://localhost:8140/ to verify that it can be accessed. You should just get a one-liner response: The environment must be purely alphanumeric, not ''. If you see a 502 Bad Gateway error instead, go back and verify that a) Unicorn is up and running, and b) you’ve configured SELinux as previously instructed.
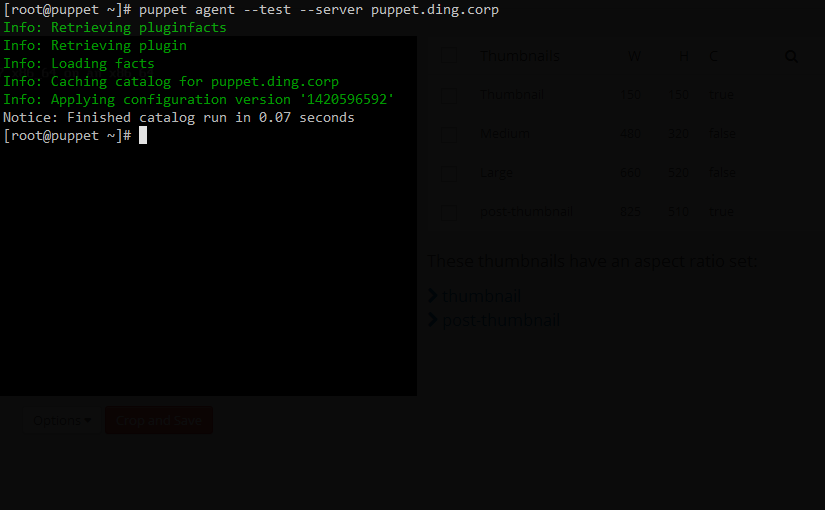
For a final test, try executing puppet agent --test --server puppet.example.com (obviously, using your actual FQDN). You should get something like this:
[root@puppet ~]# puppet agent --test --server puppet.example.com
Info: Retrieving pluginfacts
Info: Retrieving plugin
Info: Loading facts
Info: Caching catalog for puppet.example.com
Info: Applying configuration version '1420596592'
Notice: Finished catalog run in 0.07 seconds
8. Set up your agents on other nodes.
That’s a bit outside the scope of this guide. You can just follow the stock documentation from here on.
Has this guide helped? Did I get anything particularly wrong? Is there an easier way to work around SELinux? Please, feel free to chime in; your comments are welcome!
thanks for this :) this is exactly what im looking for, simple and straightforward tutorial!
instead of running uncorn server via unix socket and struggling with SELinux i configured it ( in unicorn ) to work via tcp/ip ( 127.0.0.1:8080 ) – in section “listen”