
Updated 2014-07-13 with corrected links to develop-branch version and GitHub’s new user content domain name.
Updated 2014-07-17: see this newer blog post for instructions, kickstart scripts, and prebuilt images for CentOS 7 and Ubuntu 14.04.
Backstory
Earlier this year, I installed Xen Cloud Platform (XCP) 1.6 on an off-lease Dell CS24-TY with two quad-core Intel Xeon CPUs and 72 GB of RAM. (Those machines are sold by Dell Financial Services and on eBay for unbelievably low prices, for previous generation servers of such capability.) When Citrix open-sourced XenServer, I decided to upgrade XCP 1.6 to the full-featured XenServer 6.2.0 SP1, which added a few formerly-proprietary features for larger pools (which I do not have) and improved guest support for various OSes including Windows 8/Server 2012 among other changes.
At the same time, I started looking at switching domUs from Ubuntu—which worked great, by the way—to Fedora. This was purely due to personal preference, given my penchant for keeping software up-to-date even at the risk of instability, not any failings of Ubuntu.
The issue, of course, is that Fedora isn’t supported out of the box by XenServer or its management console XenCenter, and the wealth of knowledge out there typically pertains to older versions of Fedora and XenServer. Some IT firm even posted a tip to use the “Other install media” option for installing Fedora 20, which practically defeats the point of using Xen virtualization, since that creates a fully-virtualized guest (HVM) rather than a paravirtualized domU.
So I set out to update the existing methods of installing older versions of Fedora as a paravirtualized guest to the new release, Fedora 20 “Heisenbug”.
Credit where credit is due
I’m a sucker for giving credit to everyone and anyone, but in this case a few sources really formed the basis for what I’ve done:
- Major Hayden‘s kickstarts for F16 and F17
- The Fedora Cloud Working Group’s kickstarts for automatically building Fedora Cloud images that work on EC2 and OpenStack
Needless to say, both of these sources are super helpful, although none of them really work out of the box for what I’m doing.
The modified kickstart file
If you’re already experienced and you’re just looking for the kickstart, here it is. For installation instructions, see below.
I’ve created a GitHub repository for these, and I might add files for RHEL/CentOS 6.5 in the future, too.
Here’s the master-branch version: (if you’re adventurous, try the develop-branch version)
[github file=”/frederickding/xenserver-kickstart/blob/master/fedora-20/f20-server.ks”]
The master-branch files are typically tested, while the develop-branch files may introduce new features that are not yet fully vetted. (As the MIT License describes, everything is provided with no guarantees.)
The basic idea behind the post-installation script here is to create a legacy GRUB menu.lst file, which pygrub on XenServer can interpret to boot into a paravirtualized guest.
Update: now, the post-installation script doesn’t bother with a fake menu.lst at all, and instead makes GRUB2 configuration files. Based on reports that making slight alterations to the autogenerated GRUB2 grub.cfg file to make it compatible works, and based on the changes made to pygrub in upstream Xen (which have not yet been integrated into XenServer 6.2.0 SP1), I made the script tweak GRUB2 files and regenerate a grub.cfg with grub2-mkconfig. This should be robust enough to support future kernel updates!
How to use this kickstart (with screenshots!)
This procedure assumes that you’re familiar with XenCenter and have it running already.
1. Use the Red Hat Enterprise Linux 6 template for a baseline.
This step is critical in getting a paravirtual guest, and in booting the install media correctly.
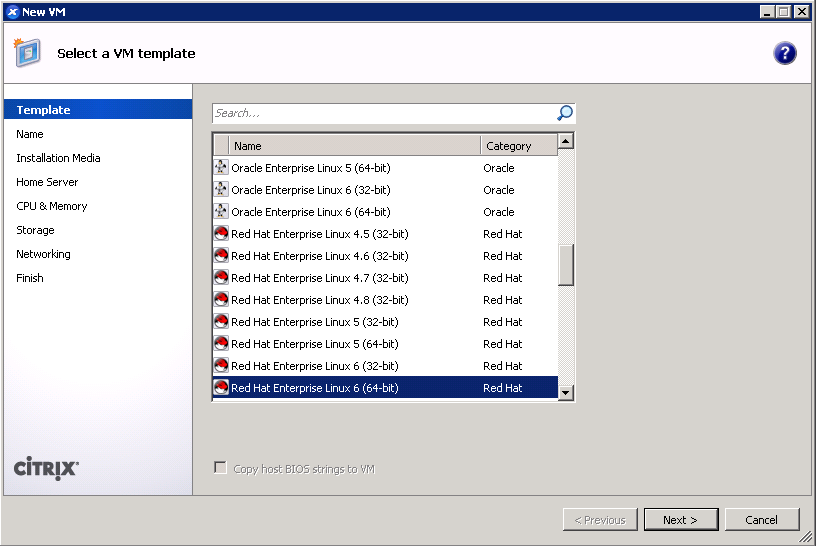
Fedora is upstream of RHEL, always newer, and more unstable, but it has the same package manager (yum), installer (anaconda), and filesystem layout. (RHEL 6.x uses the 2.6 kernel, though.)
You should also be able to use the 32-bit template if you need to, although there are few reasons not to install a true 64-bit operating system these days.
If you’re adventurous: try using the CentOS template. I doubt there are any significant differences.
2. Give your VM a name.
No special settings here.
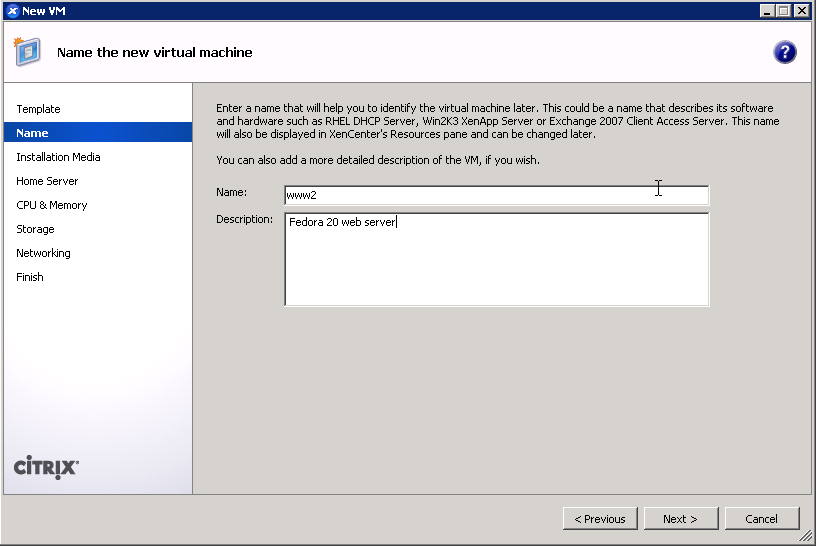
This is mostly for your (and your peer administrators’) reference; it doesn’t really affect your guest, but I have a script to set the guest hostname based on the name here.
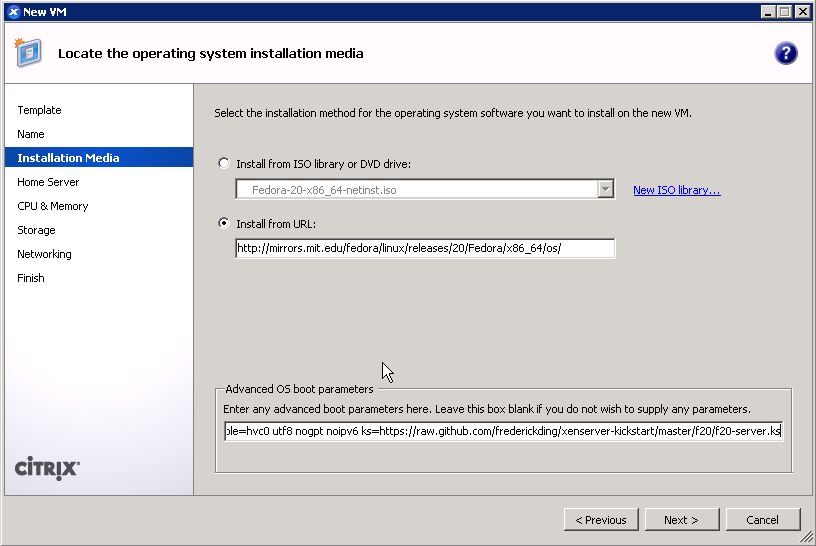
3. (most crucial page) Boot up a Fedora 20 installer with parameters.
This is the most crucial step in the UI process. Here is where you make it boot a Fedora 20 installer instead of an RHEL or CentOS installer, and preset the kickstart file to be used.
3.a. Booting up
You have two main options: boot from CD/DVD or boot from URL.
Option 1: boot from ISO image, or CD/DVD drive.
I’m assuming you’re familiar enough with XenServer and XenCenter to have made an ISO library. (Or, if you’re using this as a hobbyist and you’re still using physical media, I’m assuming you can burn an ISO to disc and can place that into the XenServer host machine.)
I typically use the net installer image (Fedora-20-x86_64-netinst.iso), since that leaves enough flexibility for installing the most up-to-date packages (the kickstart file enables the updates repository).
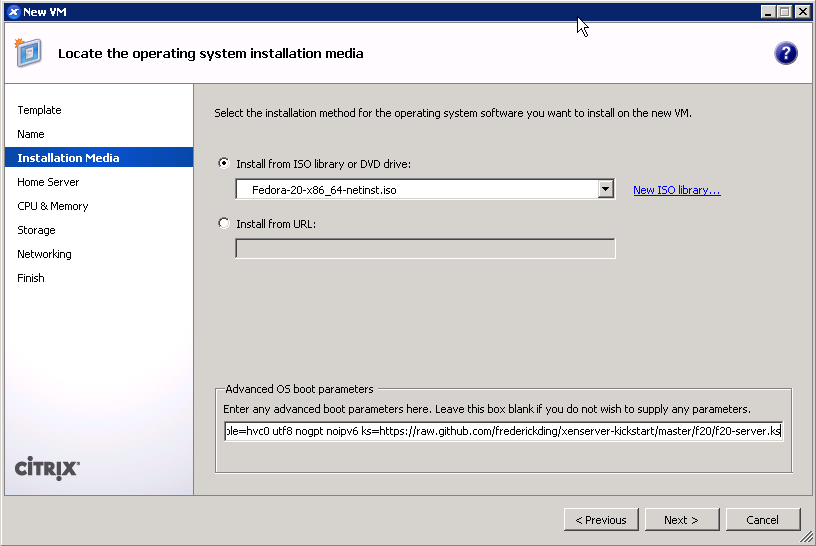
Ensure that you’re using an image that matches the 32-bit or 64-bit selection you made on the first screen.
Option 2: boot from URL.
This is the easiest option if your network is connected to the Internet (or you have another local-network copy of the install files). Enter the HTTP URL (FTP mirrors should work too) to a Fedora 20 directory, for instance:
http://mirrors.mit.edu/fedora/linux/releases/20/Fedora/x86_64/os/
or http://mirror.rackspace.com/fedora/releases/20/Fedora/x86_64/os/
As with the CD/DVD option, ensure that you match the architecture of the VM.
3.b. Using a kickstart and setting other boot options
Regardless of your boot method, under Advanced OS boot parameters, paste the following line:
console=hvc0 utf8 nogpt noipv6 ks=https://raw.githubusercontent.com/frederickding/xenserver-kickstart/master/f20/f20-server.ks
The significance? Each of these boot options explained:
console=hvc0 utf8: use the Xen-emulated serial console with a UTF-8 charset; the paravirtualized guest won’t have graphicsnogpt: we will stick with MBR since the kickstart only uses 1 partition (there may be bugs with GPT)noipv6: you can remove this if your network supports itks=https://raw.githubusercontent.com/frederickding/xenserver-kickstart/master/f20/f20-server.ks: this tells it to use the master-branch kickstart that I embedded above; you can also use the raw link to the develop-branch kickstart, or the path to your own custom version
Bonus tip: if you’re troubleshooting boot issues, you can tell Anaconda to start up a SSH server so you can connect in and fiddle with the new installation before the machine powers off.
- Add
inst.sshdto the parameters. - SSH as root, no password required, to the guest VM (you might need to figure out its IP by other means, such as by checking your DHCP/DNS server).
- The new installation filesystem lives in
/mnt/sysimage. You can fiddle with the boot files in/mnt/sysimage/boot/grub/menu.lstand/mnt/sysimage/boot/grub2/grub.cfg(if grub2 installed itself).
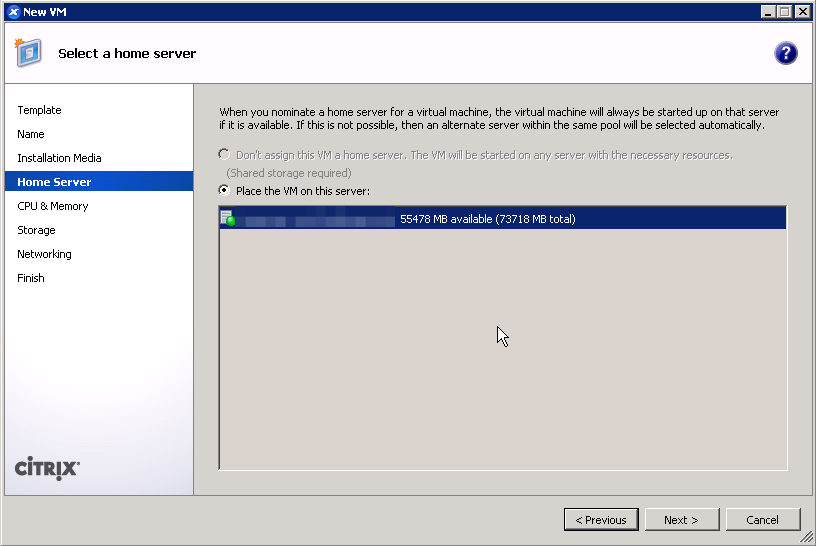
4. Set a host server.
In my case, there are no options on this screen.
5. Assign vCPUs and RAM.
In my experimentation, Anaconda demands something like 920 MB of RAM to install when a swap partition is absent. I usually set 1024 MB of RAM minimum, since memory is pretty bountiful on this server.
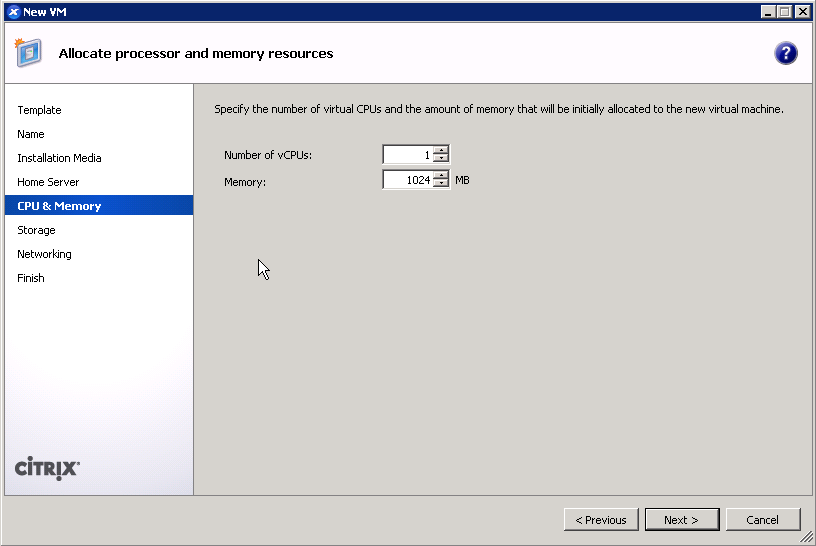
If you’re strapped for RAM, you can dial this down to 512 MB or whatever you wish, after installation.
6. Create a primary disk for the guest.
Realistically, many VMs will work fine on an 8 GB boot disk. You can mount network storage afterwards. You should configure this screen however you typically do (I’m assuming you’ve used XenServer before).

7. (important!) Configure networking for the guest.
It’s critical that this works out of the box for your VM, since the kickstart script assumes that we’re installing over the network. But since I’m assuming you’ve used XenServer and XenCenter before, the defaults here should work, given that your network infrastructure (DHCP, DNS) works.
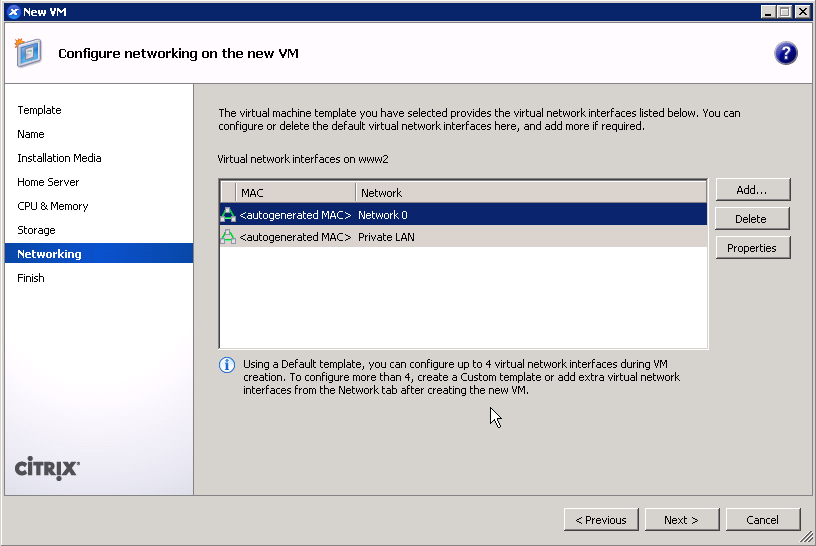
You’ll probably only see one network on this screen.
8. Finish the wizard and boot up the VM!
Not much to see here.
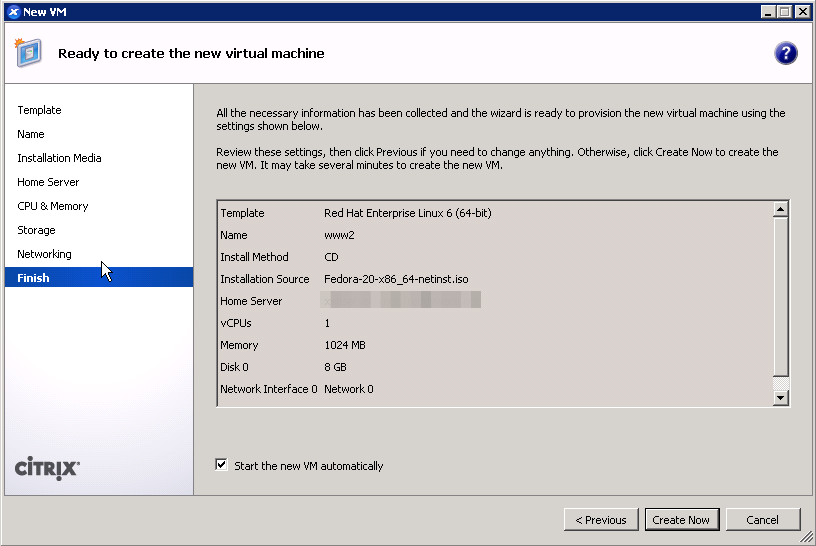
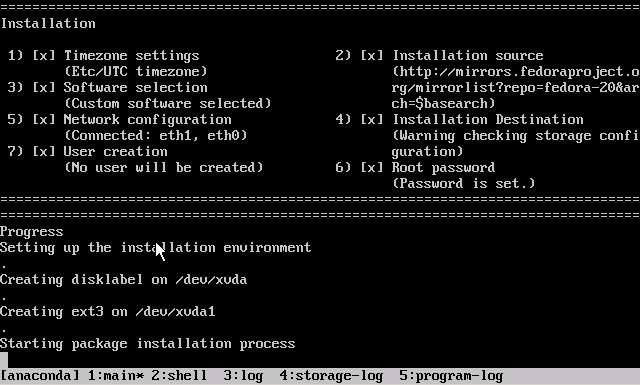
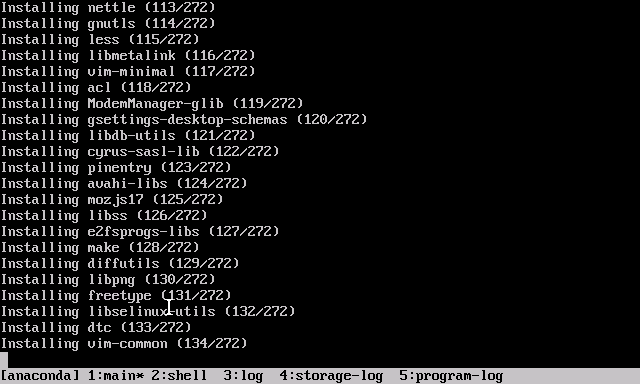
Once you click Create Now, the new paravirtualized guest should boot right into the Fedora installer in text mode.
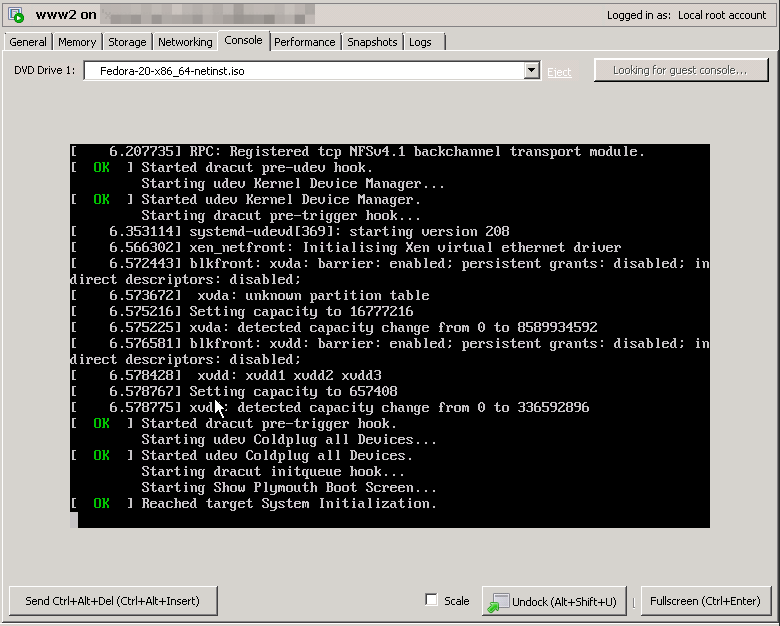
Due to our use of the kickstart-automated installation, the process will not be interactive.
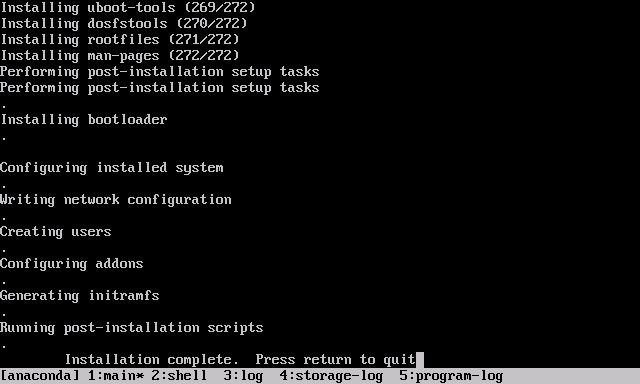 At this point, you should hit <Enter> to halt the machine.
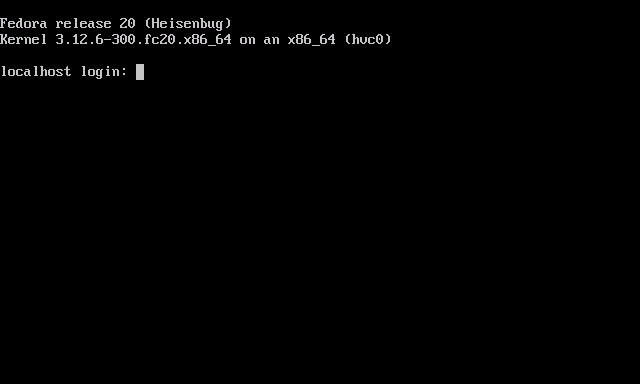
9. Boot up your new Fedora 20 domU!
If everything went according to plan, you should have a paravirtualized Fedora 20 guest VM waiting for you to log in for the first time! (The root password in the kickstart script, at the time of this writing, is Asdfqwerty. Check what’s embedded above.)
After you log in for the first time, you can change the root password, install other packages, configure networking (e.g. static IP) and the hostname, install XenServer Tools, and start using your domU!
Did this guide help you? If it did, I’d love to hear about it—drop me a comment below!
Hey mate,
Appreciate the guide! XenServer Tools (XenTools) don’t appear to work on Fedora 20. I’ve installed them using the ./install.sh method and it installs the packages but XenServer 6.2+ still reports it as “XenServer tools not installed”.
Any ideas?
–Steve
Hm, that’s odd. I know that they sometimes take a while before XenCenter will report them installed, but mine show up properly:
Perhaps you should look at rebooting the machine, or installing the RPMs on the XenServer Tools disk using
yumorrpmdirectly.I’ve tried installing it manually but the packages complain they are already installed. I’ve also adjusted my boot parameters (mine were still populated from before) to match yours and still no go.
I’ll spin up from scratch and try again.
Thanks.
One other thing — check
systemctlto make sure the relevant Xen/”xe” related services are enabled and running…I’m not a big user of Fedora. Running “systemctl –all | grep xen” doesn’t list anything. So that explains a lot.